
Many modern games have AI controlled characters to add to the atmosphere of a scene or to provide gameplay to the player.
To achieve this in Unreal Engine 5 we need to have a generate a mesh for the characters to navigate through and also create a character that has AI navigation correctly setup. These are easy steps but issues can occur if not setup correctly!
In this guide we are showing you how to set up a NavMesh and basic AI Character in Unreal Engine 5.
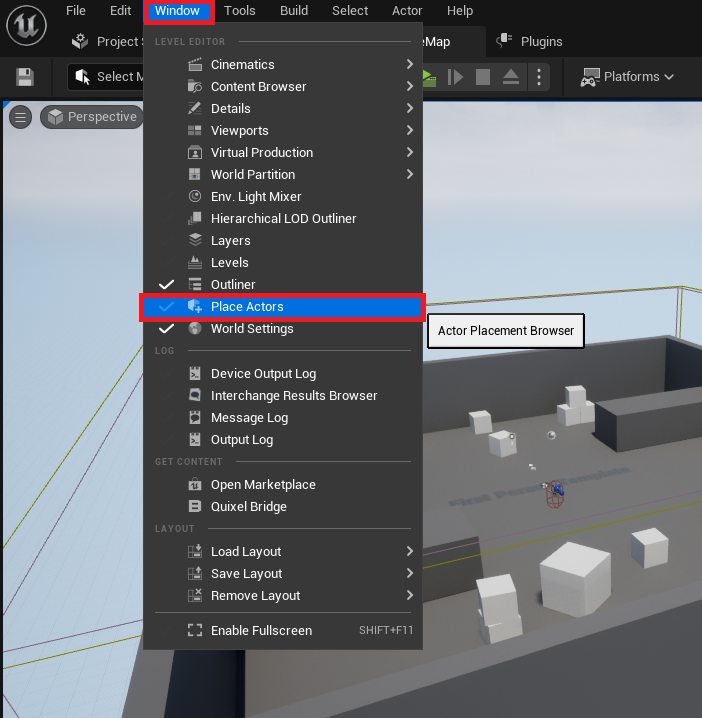
Firstly, click Window, then Place Actors. This will show the Place Actors window in the editor. This window allows you to spawn basic objects and volumes into your Unreal Engine 5 level.
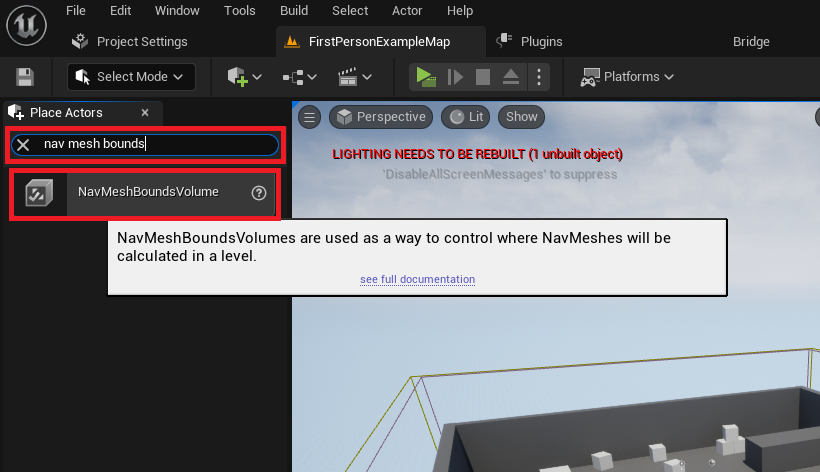
Then, add a NavMeshBoundsVolume actor to your level. This can be found in the Modes panel under the “Volumes” category.
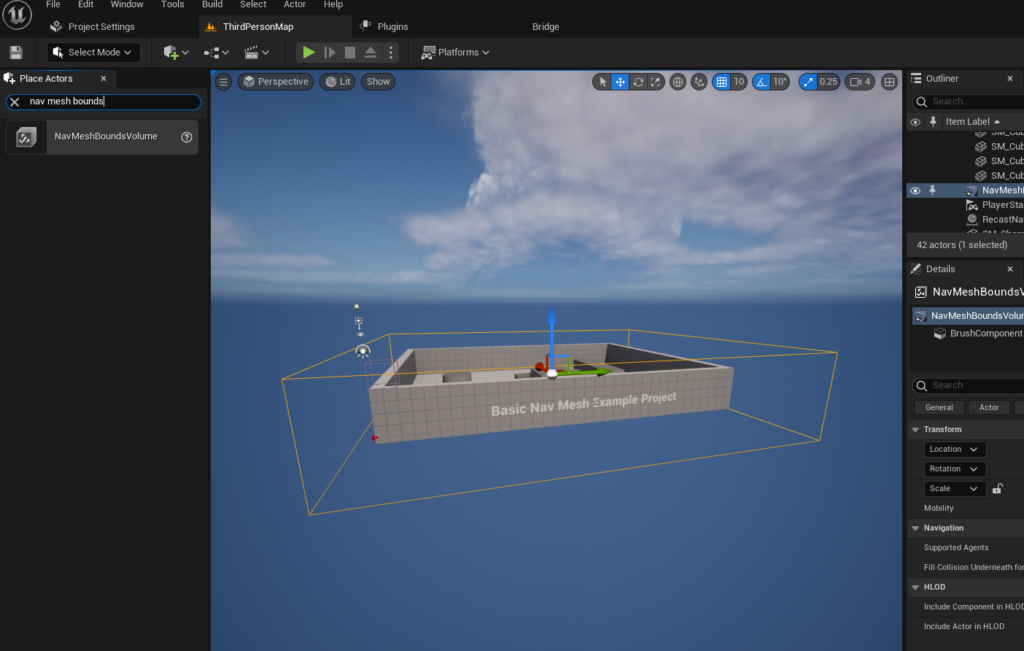
Scale and position the NavMeshBoundsVolume to fit around the area that you want the AI to be able to navigate.
This can be as large or as small as you require. Bigger nav meshes take longer to generate unless you use dynamic generation. Click here to read about dynamic nav mesh generation.
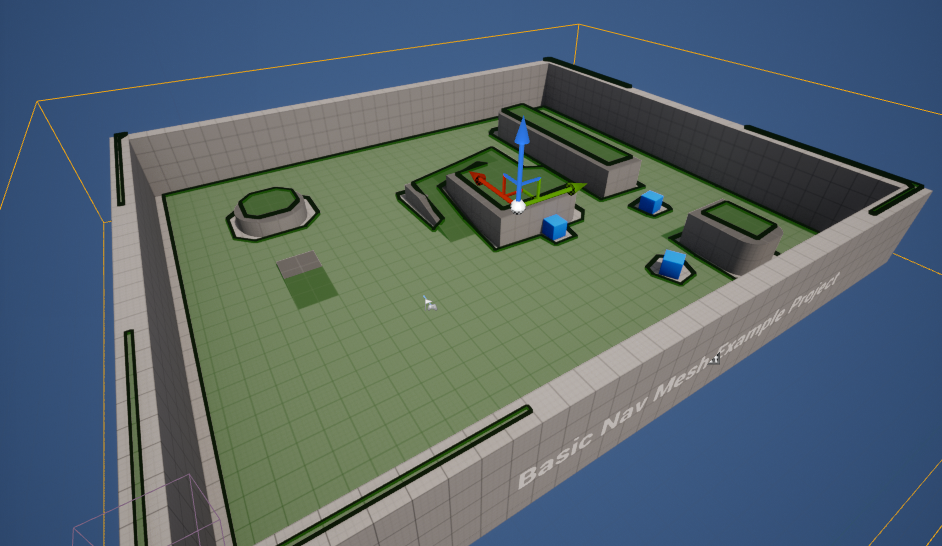
Now to confirm your Nav Mesh is setup correctly for your level, Press the “P” key on your keyboard to see the mesh visualized in the level.
Moving the AI Character
For this guide we are using the third person template that Unreal Engine 5 provides.
This means we can have an animated character to test the AI Navigation.
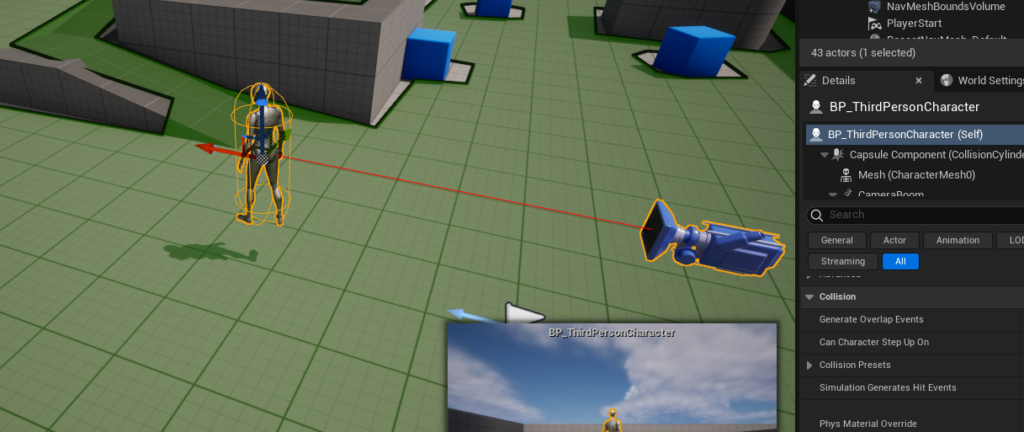
To enable our third person character blueprint to navigate the level, first drag your character into the level.
This can be found in the “Third Person / Blueprints” folder in the Content Drawer if you created your project using the Third Person Template.
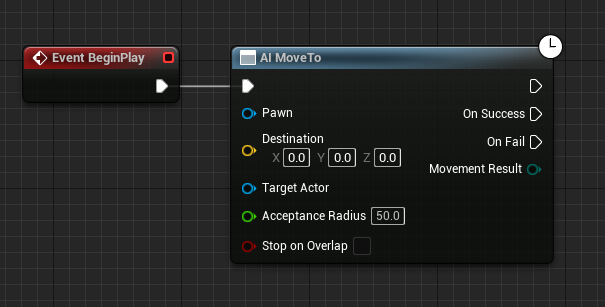
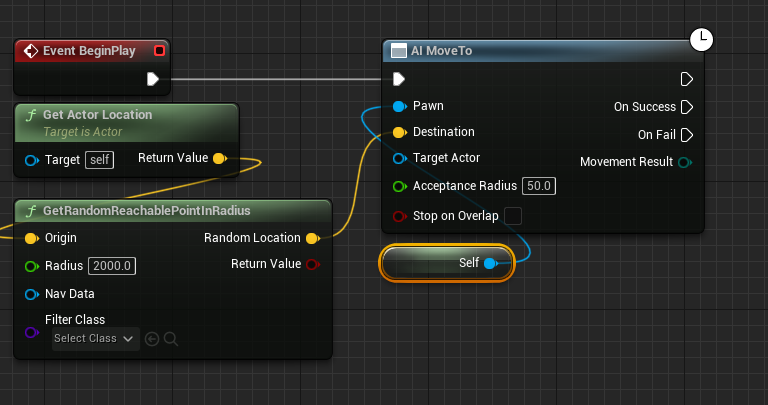
In the blueprint editor of the character, create a “Begin Play” event and connect the “AI MoveTo” node as shown in the image below.
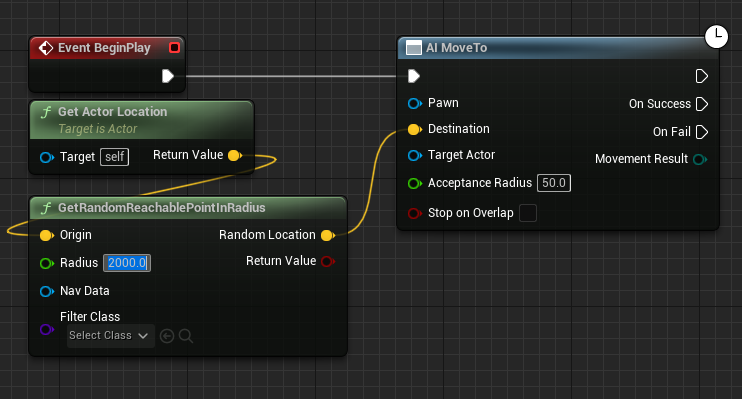
Next, create a “GetRandomReachablePointInRadius” node and connect the output yellow vector pin to the yellow “Destination” pin on the “AI MoveTo” Node.

Then create and connect a “Get Actor Location” node to the “Origin” yellow vector pin. This Origin position is where the random movement is calculated around.
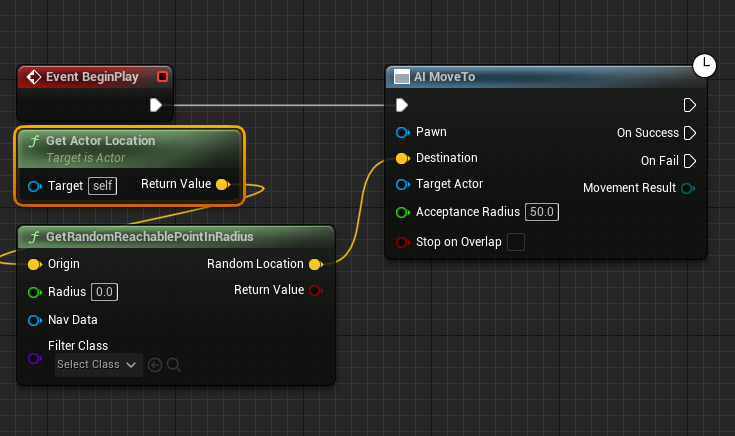
Set the green “Radius” pin value to the distance you want your AI to roam around. In this guide we are using “2000”.
Create a “Reference to Self” node and connect this to the blue “Pawn” pin of the “AI MoveTo” node.
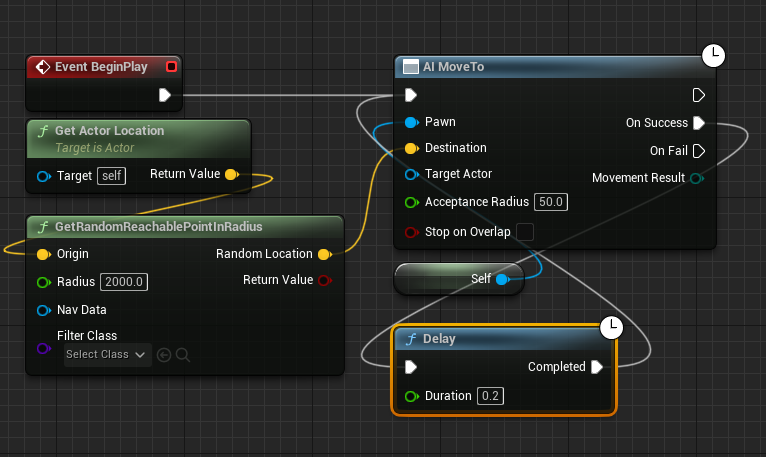
Finally, create a “Delay” node then connect it to the “On Success” pin. Connect the end of the Delay back into the AI MoveTo node. This will continuously navigate the AI character around the Navigation Mesh.
Now you can click “Play” and the character will then begin moving towards random locations in your level using the NavMesh.
Demo Video
Download the Project Files
Conclusion
Now your character is moving around the level all by itself! This AI behaviour is very basic but can be expanded upon greatly using many of the great AI features in Unreal Engine 5. To learn more about AI and Navigation in Unreal Engine consider reading further using the links below.
Further Reading:
How to smoothly rotate AI characters in Unreal Engine
Open world navigation in Unreal Engine
Dynamically generated navigation in Unreal Engine
Official Unreal Engine Navigation documentation
Nice