
Unreal Engine 4 contains a powerful multiplayer compatible damage system that works with all actor types.
This system easily allows you to create a Multiplayer Damage and Health System in Unreal Engine 4 only using blueprints.
Prerequisites
This guide expects that you understand how to use basic nodes such as branch, get player controller and input actions / events.
If you do not know how to use input actions in Unreal Engine 4 click here to read our guide.
This guide also expects that you know what a line trace is and how to set them up for a first person style game.
If you do not know how to setup first person line traces click here to read our guide.
How Unreal’s Damage System works
How to Deal Damage
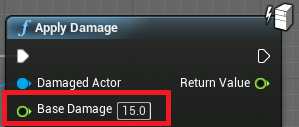
The most basic way to deal damage to another actor is to use the “Apply Damage” node.
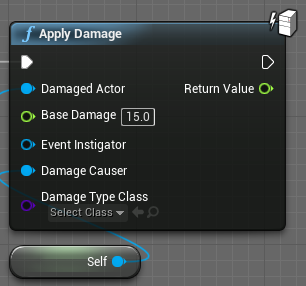
Here are the important variables to set:
Damaged Actor – The actor that you want to damage
Base Damage – The amount of damage to apply to the damaged actor
Damage Causer – The actor that applied the damage to the damaged actor
How to Detect Damage
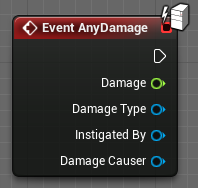
When added to any actors event graph, the “Event AnyDamage” event node runs every time the actor is damaged.
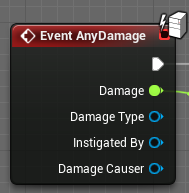
Here are the important variables to use from the event node:
Damage – The amount of damage that is detected
Damage Causer – The actor that dealt the damage
Creating the Weapon Damage Nodes
We recommend using the default First Person Shooter template for this guide.
This damage system works will all game types but when learning a new system it is easier to have a template that works well before you start.
The First Person Shooter template has a player character setup with movement, mouse aiming, arm and gun models and animations.
Requesting to Shoot to the server
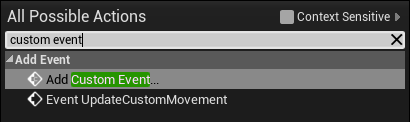
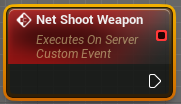
Firstly, to make the weapon damage run correctly on multiplayer, create a new custom event called “Net Shoot Weapon”.
Then click the new event (Net Shoot Weapon) and in the detail panel on the right of the screen change the “Replicates” drop down box to “Run on Server”.
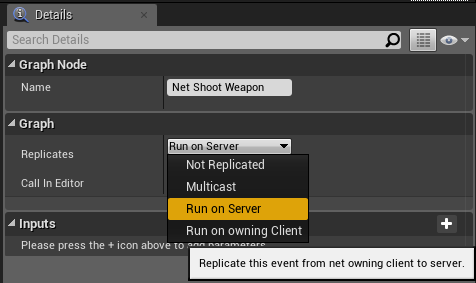
Changing this setting will now run this event from the client to the server. This prevents cheating as all damage and collision checking will be done server side.
Next create an InputAction Fire event (included in the first person shooter template) and create a Net Shoot Weapon node to the Pressed pin.
This will send a message to the server to shoot your gun and calculate the
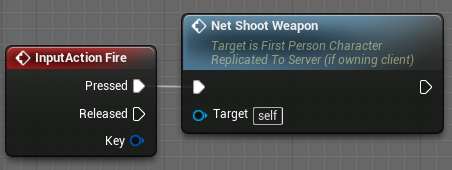
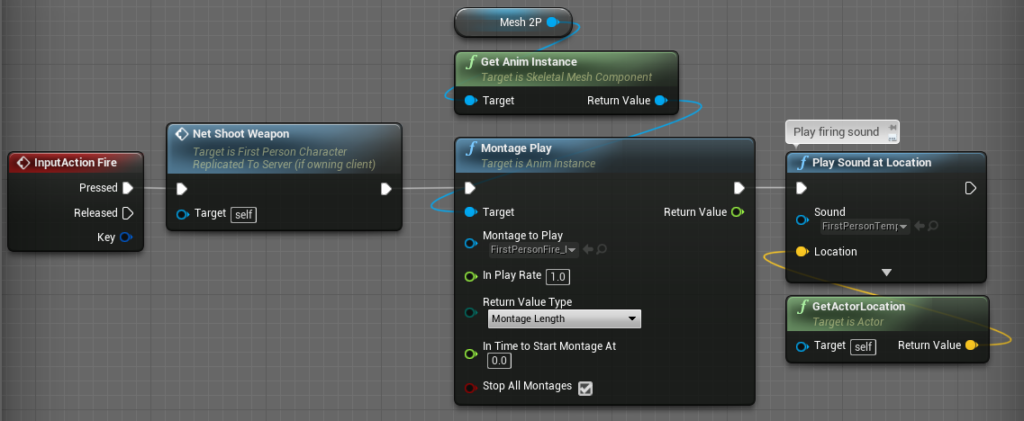
Finally for this section to be complete, connect the animation and sound effect blueprint nodes from the template to the Net Shoot Weapon execution pin.
This complete section will look like this:
Syncing the Animation and Sounds
The animation and sound effects running on the previous step don’t currently run for other players.
To play the animation and sound for this player on everyone else’s screens we need to create a multi cast event.
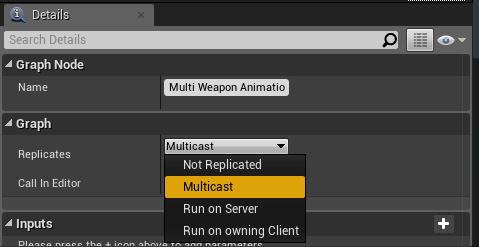
Firstly, add a new custom event named “Multi Weapon Animation”.
And change the “Replicates” to “Multicast”.
Create a branch node, a Get Player Controller node and a Get Controller node.
From the Get Player Controller node create an equals node and connect the “Get Controller” node to the bottom pin as shown below.
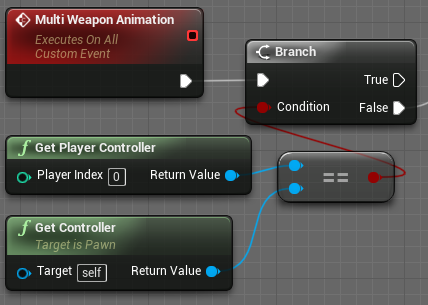
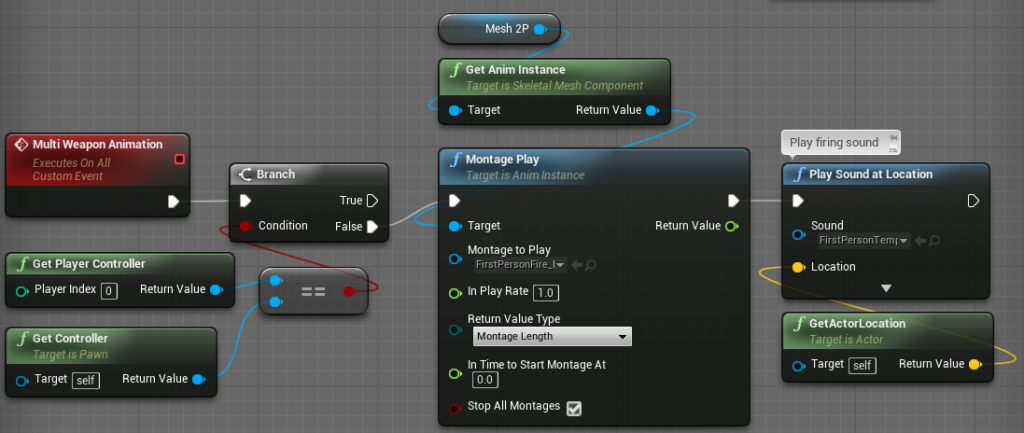
The last nodes required for this step can be copied and pasted from the step above.
The complete section looks like this:
Server-side Weapon Shooting
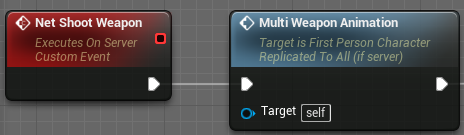
Firstly, from the “Net Shoot Weapon” event created earlier in this guide, we need to create a “Multi Weapon Animation” node and connect it together.
This will sync the animation and sound to all clients on the server whenever a player shoots.
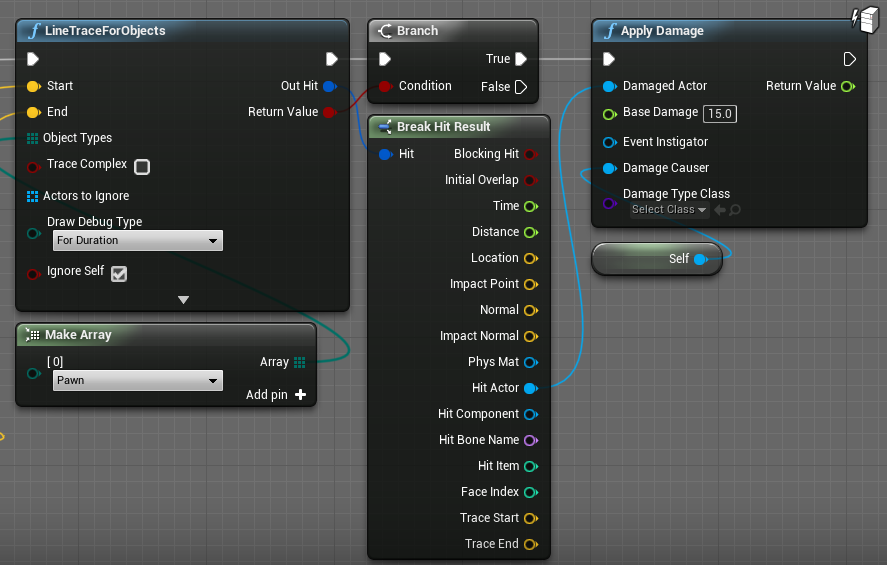
To damage another actor when the request is received, we first will need to use a Line Trace for Objects node.
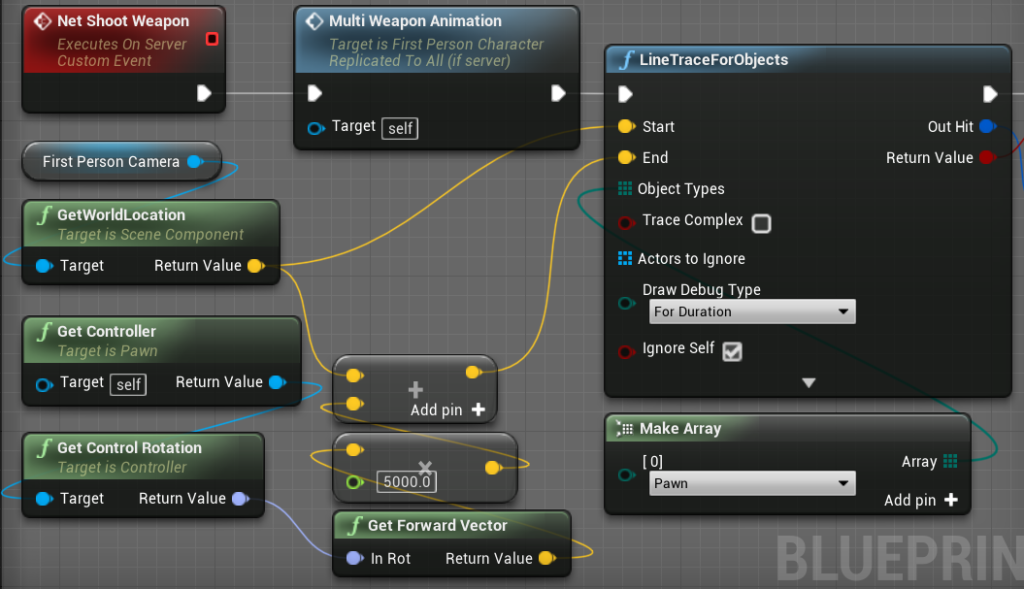
If you do not know how to setup a line trace click here to read our guide on first person line traces in Unreal Engine 4
From the line trace we need to create an “Apply Damage” node and connect the “Hit Actor” pin from the “Break Hit Result” node to the “Damaged Actor” pin on the “Apply Damage” node.
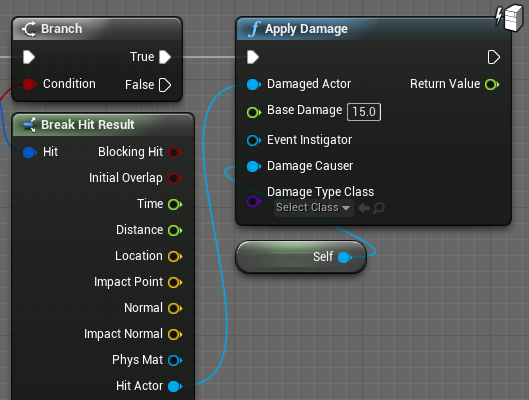
Set the “Base Damage” value to the damage that you want your weapon to deal. (We used 15.0 in this case)
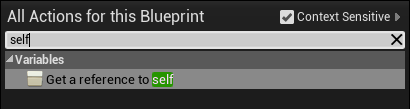
Lastly, create a Self node and connect it to the “Damage Causer” pin.
After all these steps, the line trace connections should look like this:
And here is the complete Net Shoot Weapon event blueprint nodes:

Receiving the Damage
Firstly create an AnyDamage event in the actor that you want to receive damage.
Create a new variable named “Health” with the type of float. This will be used to store the amount of health the actor has.
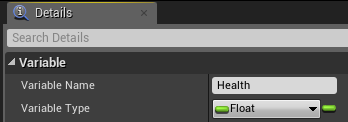
Set the default value of the “Health” variable to 100 (or whichever you want your actors max health to be)

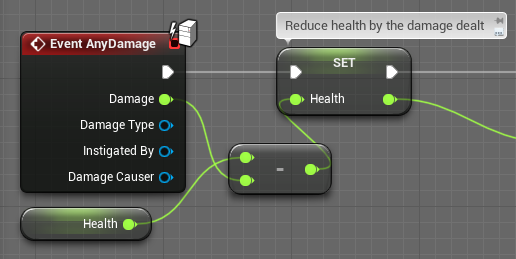
Next create a Get node for Health, subtract Damage from Health and then set Health to this new value.
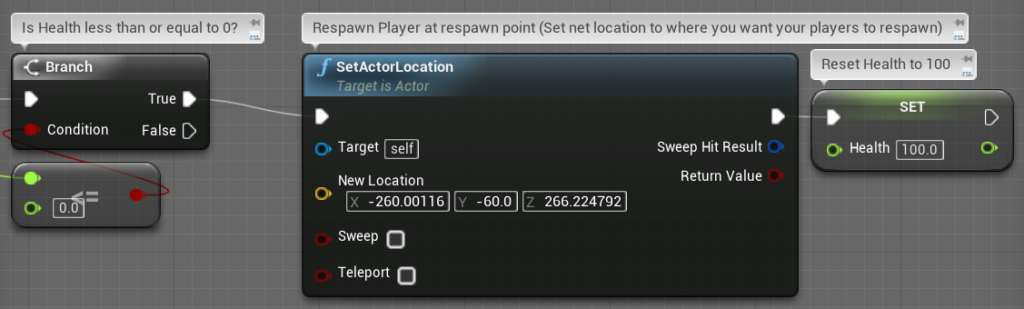
From the Set Health node create a “Less than or Equal” node, create a branch node and connect them together. This checks if the player’s health is less than or equal to zero after taking the damage
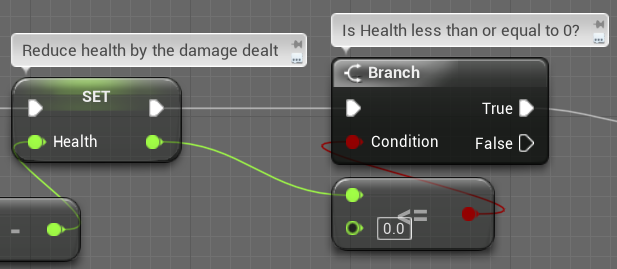
Finally, on the True execution pin create a “SetActorLocation” node and set the New Location value to where you want your actors to respawn when they run out of health.
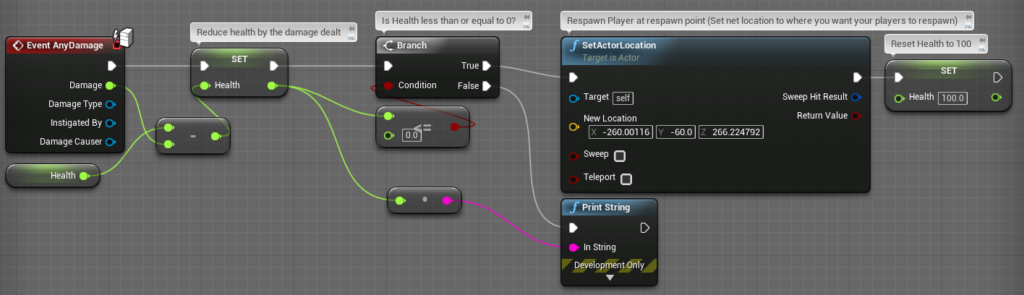
Here is the complete Event AnyDamage blueprint nodes:

Demonstration
To visualise the health of the hit player easier we added a “Print String” node here:
Download the Project Files
Conclusion
Now your game or project has a fully multiplayer compatible damage system all using blueprints!
Expanding this System
To improve this system you could add a widget to the screen showing when a player is defeated and with what weapon they were defeated by.
Another way to improve this shooter style game would be to add attenuation to the shooting sound effects.
This would reduce the volume over distance and make the game more realistic. Click here to check out our guide on attenuation in Unreal Engine 4.
Lastly, try expanding from this guide by creating AI character with health and damage with our easy AI movement guide. https://couchlearn.com/easy-ai-movement-in-unreal-engine-4/
Further Reading
Unreal Engine’s blog post on their damage system: https://www.unrealengine.com/en-US/blog/damage-in-ue4#:~:text=Damage%20support%20is%20a%20feature,your%20damage%20model%20when%20needed.
The full damage blueprint node documentation can be found here: https://docs.unrealengine.com/en-US/BlueprintAPI/Game/Damage/index.html
Leave a Reply