
Structures are useful for most aspects of Game Development as they are incredibly versatile. In UE4 this is no different.
When we are finished, our FPS example template character will print the ammo after shooting an will remove one ammo after every shot.
What is a Structure (Struct)
In Unreal Engine 4, the struct is an easy way to create your own variable type, giving you the ability to substantially improve the organisation and access of the data in your blueprints.
One example of using a struct in your UE4 game would be to have a single struct that contains your player’s position, health, ammo and lives.
This then can be saved and loaded as one variable therefore streamlining the process as your game gets more complicated.
In this guide we will be learning how to create a structure and how to use structures in Unreal Engine 4.
Creating the Struct
To create your struct, firstly right click in the content browser and in the bottom section click on the Blueprints tab.
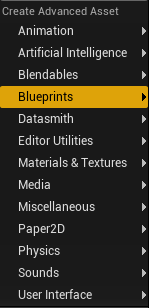
Once in the Blueprints tab, find and click on the option named Struct.
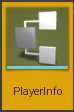
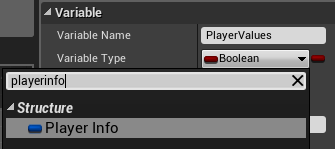
Rename this new file something suitable and save. In this example, I named mine PlayerInfo.
Setting up the Struct
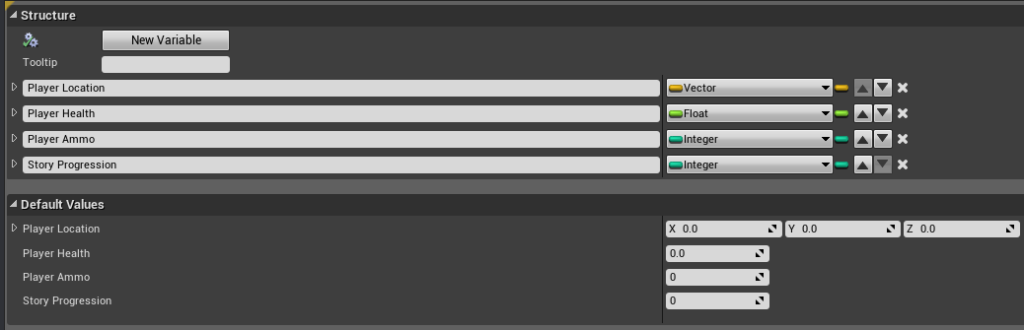
Before we can start to use our new struct we need to fill it with variable types and give them the names that we want that data to be known as.
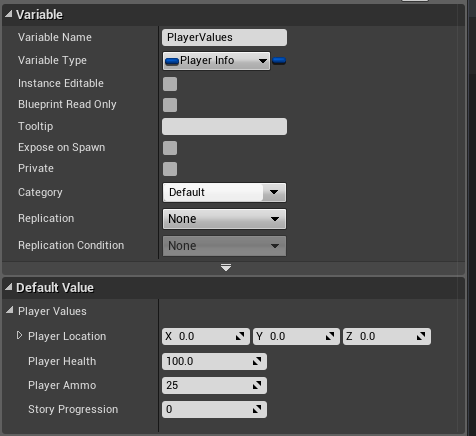
In my case, I have added a Vector named ‘Player Location’, a Float named ‘Player Health’, an Integer named ‘Player Ammo’ and another Integer named ‘Story Progression’.
This struct can now be added as a new variable in our main character blueprint.
Creating the Struct on our Player Character
To access the struct, simply create a new variable in our main character blueprint and set the type to the name of your struct created earlier.
Compile and save your blueprint to show the values of the struct.
I have set the initial values to 100 for the player’s health and 25 for the player’s ammo.
Accessing the Struct on our Player Character
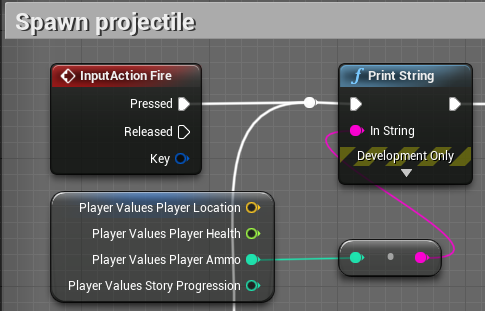
Getting the Values
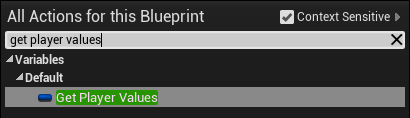
To get the values inside our struct, simply type get and then the struct variable name. In my case I typed ‘get PlayerValues’.
From this new get node, right click the pin and click the split struct pin button. This will now expose the values inside the struct.
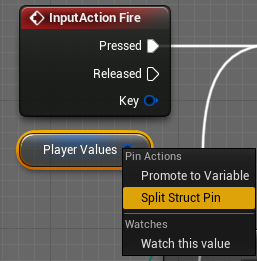
From this get node, I access the PlayerAmmo value and can then print it to the screen using the Print String node.
This will now display my ammo on screen when the Left Mouse Button is pressed.
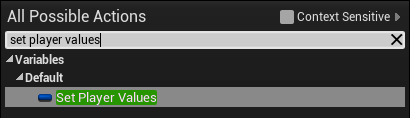
Setting the Values
To set the values inside our struct, simply type set and then the name of your struct variable. In this case I typed ‘Set PlayerValues’.
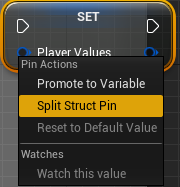
From there, right click the left pin of your Set PlayerValues node and click split struct pin. This will then expose the values of your struct variable which then can be set however you want.
For my character, I access the struct variable and set the Player Ammo value when I have fired my weapon using the Left Mouse Button.

When setting your values make sure to never leave any empty as they will be overwritten!
In the example above I set the location, health and story progression values to the values it already stored.
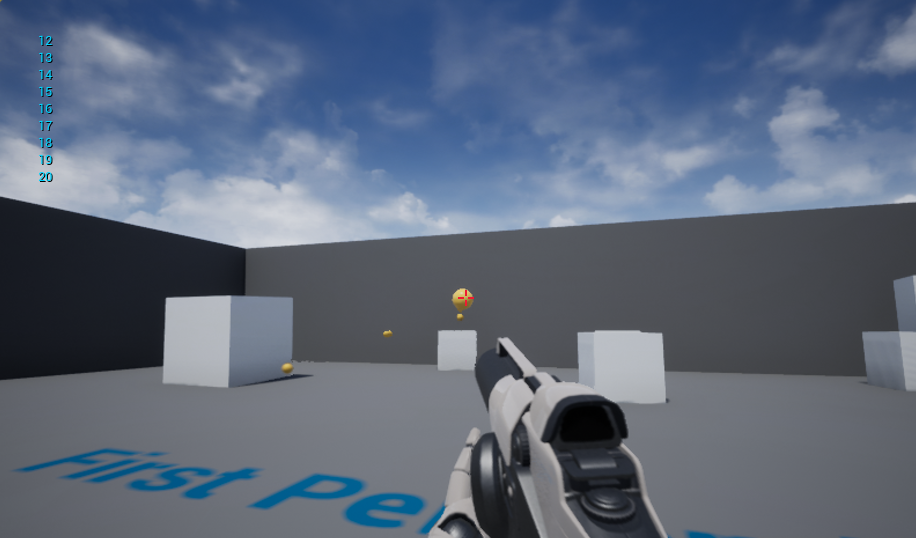
Example
Every time the player presses the left mouse button the bullet is shot and one bullet is taken away from the ammo. The remaining ammo is then printed on the screen.
Conclusion
Now you have a fully working struct in your project that can now be used to store your player’s current status and progress.
This setup makes your general player variables much more organised and prevents data from being hard to track down.
The struct is a key part of shrinking large areas of blueprints into compact and efficient systems.
With this setup and working you can now create your own new structs for other gameplay tasks and uses.
Further Examples
Structs are great for creating a quest system. Each quest uses the struct for its location, enemies to spawn/ be defeated, gold reward and more.
This then can easily be added to a UMG widget to display the info on screen. Furthermore this can then be saved easily to preserve the player’s progress through the quests in your game.
One essential use for structs is to create an utilize Data Tables.
To read the Unreal Engine 4 documentation on Structs click here.
Can I use Set-array for Structure? I tried but after Add me Set is empty
If you are referring to an ARRAY you can use structs easily. Right clicking on the struct pin in the array nodes will let you set the individual values of the struct inside the array.
Sets can be used for structs but can’t be changed during runtime.
Here is the documentations for sets.
https://docs.unrealengine.com/en-US/Engine/Blueprints/UserGuide/Sets/index.html
Can a another blueprint accsess the structure?
Yes all blueprint classes can access the struct. This is done by accessing it like any other variable.
Once you have a reference to the object with the struct variable use a Get STRUCTNAME node and you can access the data.
Thank you so much! Easy to read, and works!
Can I access the structure using C++ ?
BP Structs cannot be used in C++. You will have to make the USTRUCT in C++ and expose it to Blueprints in the code.
Excellent guide on using structs in Unreal Engine 4! Structs indeed bring organization and efficiency to game development. Your step-by-step explanation and examples make it easy to implement. Thanks for sharing!