
Utilizing Multiplayer Sessions in Unreal Engine 5 allows customization of your multiplayer session settings such as player limits, public, and private slots. You also get access to the server browser to view all the active game sessions.
Unreal Engine 5 has many built in blueprint nodes to make this process really easy!
In this guide we will be setting up a basic multiplayer game using sessions in Unreal Engine 5. Players will be able to setup a session that others can join through a menu.
Online and LAN Support
Unreal Engine 5’s NULL online subsystem can not find sessions outside of the player’s local network.
To find and connect to sessions outside of your local network without a direct IP address connection you need to use a different online subsystem such as Steam.
Click here to read the documentation for the Steam subsystem
Creating our Widget
Creating the Widget Blueprint
To allow our players to create their own sessions and join others we need to create buttons and text on screen. In Unreal Engine 5 this is called a user interface widget.
Firstly, right click in the content drawer and create a Widget Blueprint
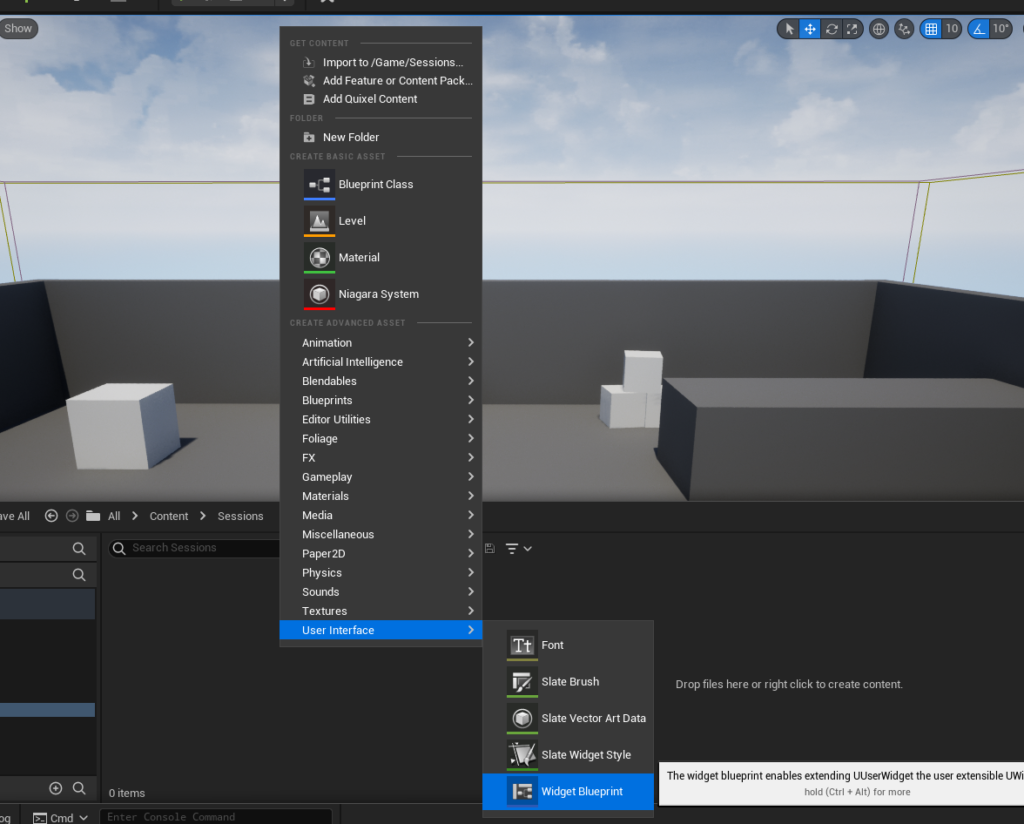
Click “User Widget” in the menu that pops up.

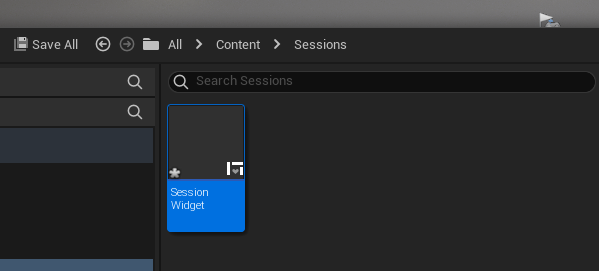
Now we have to name our widget blueprint. For this guide we named the blueprint “Session Widget”. You can name your widget blueprint anything you like but make sure to remember the name for a later step!
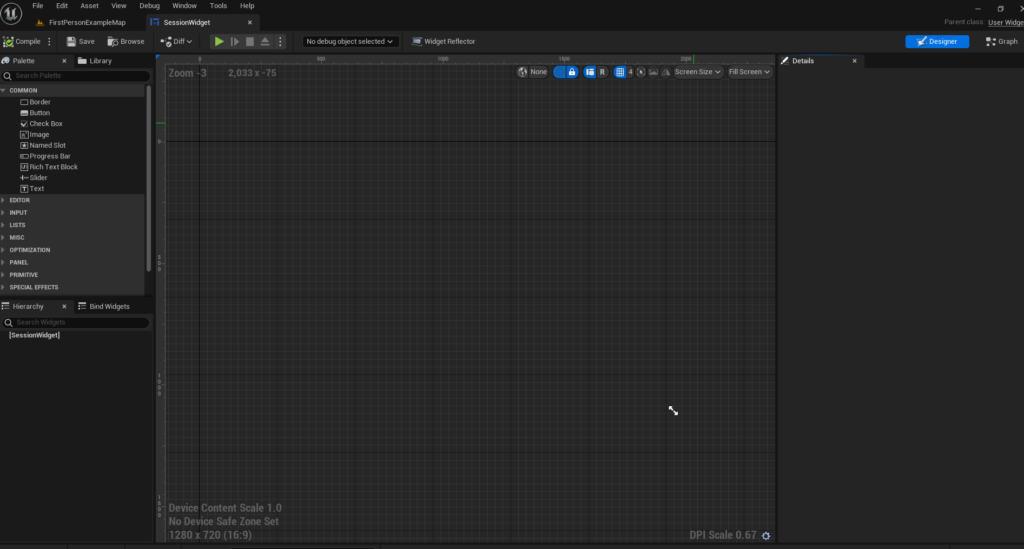
Finally, double click your widget blueprint and you will see the Widget Designer window.
Designing our Widget
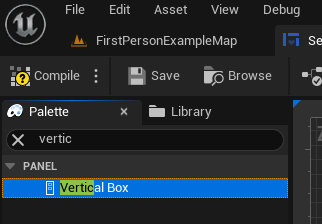
When designing widgets, you can find all available widget elements in the left side Palette menu.
To start designing your session widget, simply search for Canvas Panel and drag it into the middle section of the window.
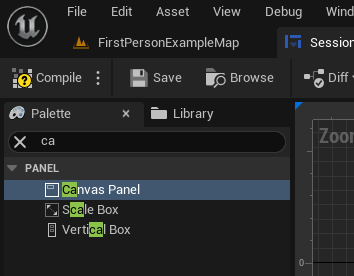
Next, search for Vertical Box and drag it into the middle section of the window. These layout elements will be the main structure of your widget.
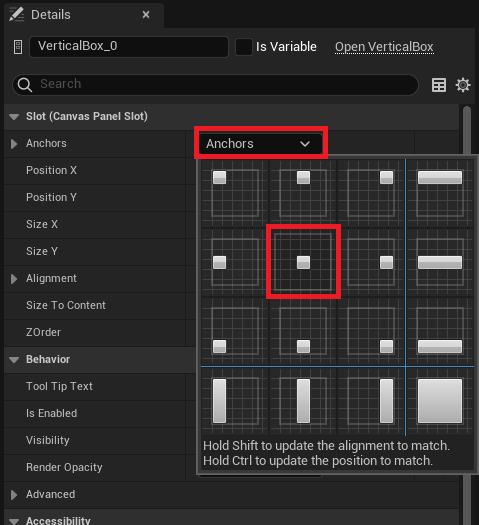
From there find the details panel on the right side of the window. Click Anchors and select the center box option shown in the image below.
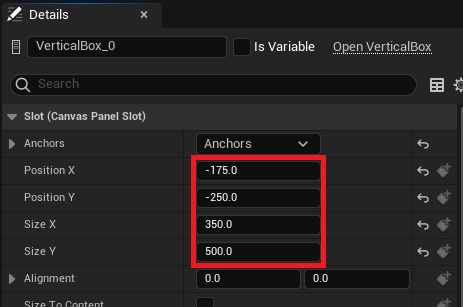
After setting the anchors correctly we can begin to set the size and position of our widget.
Below the anchors drop down, set Position X, Position Y, Size X, and Size Y to the values shown in the image below.
Now, in the Palette menu, create two buttons. These will be interactable by the user to create and join multiplayer game sessions.
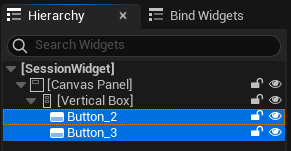
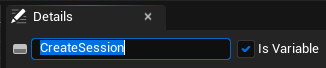
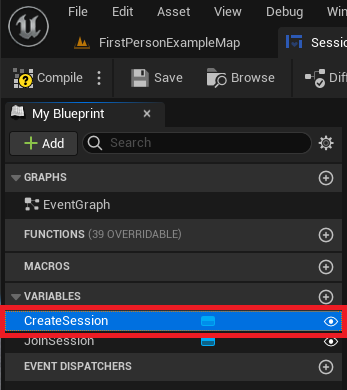
So we can access the buttons in the next step, click the first button and change the name in the details panel to CreateSession.
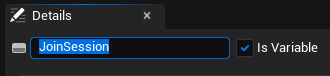
Repeat this for the next button and name it JoinSession.
To show to the user which button is used for creating and joining we need to add text to the buttons.
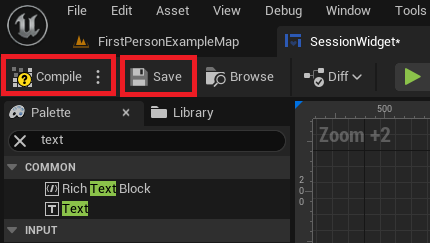
In the Palette menu search Text and drag the text onto the button. As you can see the text appears on the button and automatically resizes it so it fits well.
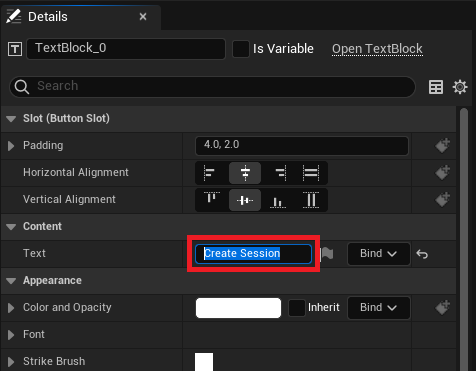
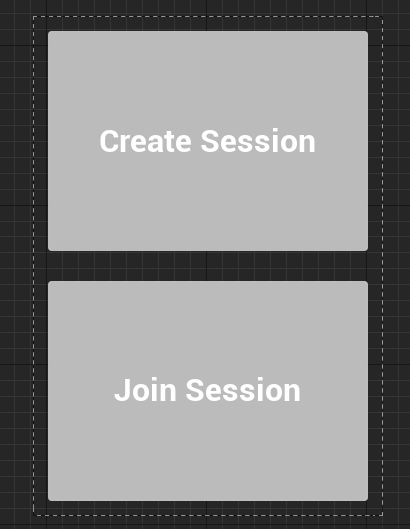
After creating one text element for each button, change the Text value for each Text element in the right side Details panel.
Set the top button to Create Session and the second button to Join Session.
Now to improve the design of our buttons, select both buttons and in the right side Details panel set Padding to 15 and click Fill.
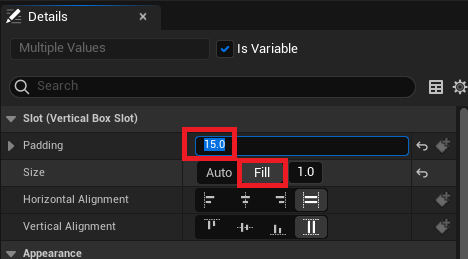
Now our widget buttons are neatly arranged and easy for the players to use.
Once you are done customizing your widget, click Compile and Save to ensure your changes are applied.
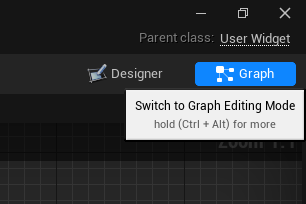
Finally, click the Graph button on the top right side. This will switch the Widget Designer to the Widget Blueprint editor ready to give functionality to your widget!
Hosting and Joining a Multiplayer Session
Creating and Hosting our Game Session
Now that we are in the Widget Blueprint editor, you should see your two buttons in the Variables section on the left.
Click the first button in the list.
Below you should now see a Details menu with all of the events available to your button.
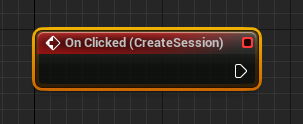
We need On Clicked so click the big green box with the plus icon inside to add this event.

You should now see the On Clicked event for your button in the middle editor window.
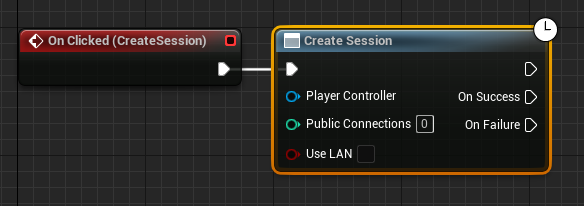
Right click anywhere and type Create Session. Click the option in the menu that shows Create Session.
Now connect the nodes together using the white arrows as shown below.
Right click anywhere and type Get Player Controller. Click the option in the menu and connect this to the blue pin.
After the blue pin is connected, set the Public Connections number to the maximum amount of players you want per game session.

Opening Levels to Multiplayer
Right click anywhere, type and select the Open Level option and connect this node to the On Success pin.
To create a multiplayer game using your level, set the “Level Name” pin to the level you wish to play on. In our case, this is FirstPersonExampleMap.
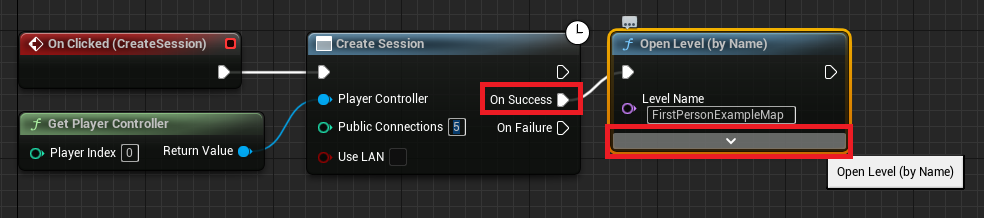
Lastly, click the drop down arrow and into the Options text box type:
?listenWith these steps complete, the code should look like this.

This code sets the level up to listen for multiplayer connections as a Listen Server.
Connecting to your Multiplayer Session
Finding Sessions
Finding multiplayer sessions using Unreal Engine 5 blueprints is incredibly simple.
The Find Sessions node searches and finds the active game sessions for your players to join. It outputs different execution pins based on if it succeeded or failed. The session results are returned as an array.
If you aren’t familiar with arrays click here to learn about arrays in Unreal Engine.
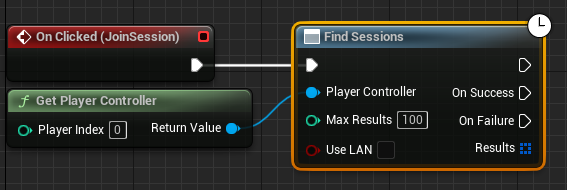
Firstly, we need to create the On Clicked button event for our JoinSession button, as we did in the previous step.
From there, right click and create the Find Sessions and Get Player Controller nodes. Connect this node to the On Clicked event, connect the Get Player Controller node to the blue pin, and set Max Results to 100.
Max results is the amount of sessions it will try to find.
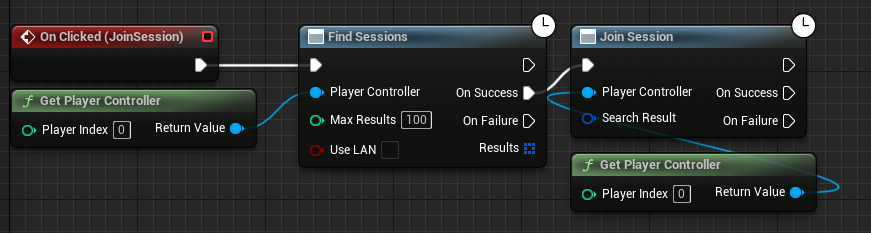
Joining the Session
Next, we need to create the Join session node and another Get Player Controller node. We could reuse the previous node but it makes the blueprints easier to read.
The Join Session node should be connected to the On Success pin on the Find Session node.
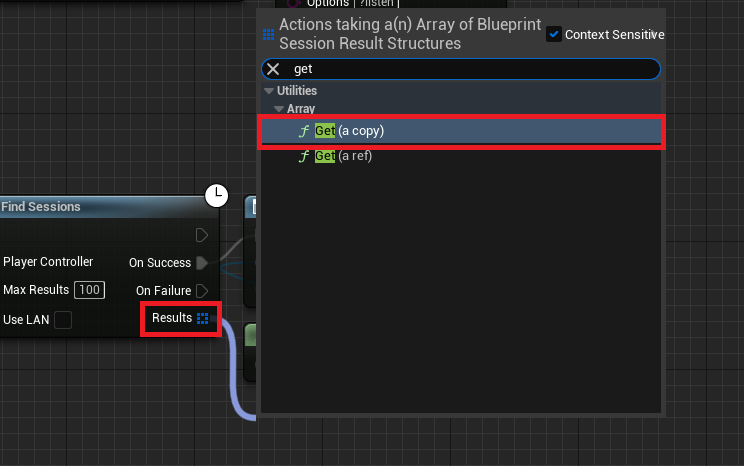
From the Results square pin, drag and let go to open the blueprint node menu. We can then type get and create a Get (a copy) node.
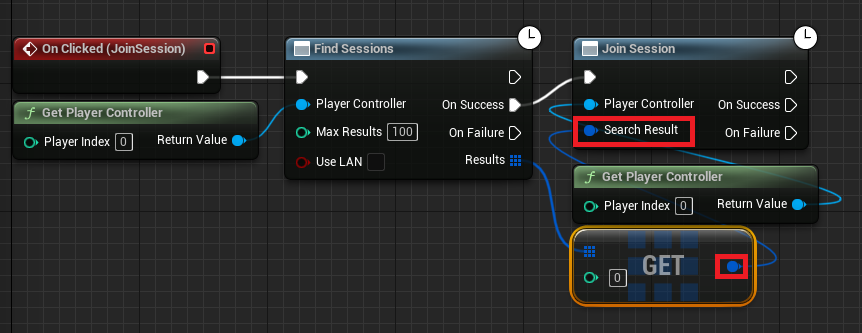
Finally, connect the Dark blue pin of the Get node and connect this to the Search Result input node.
Adding our Widget to the Screen
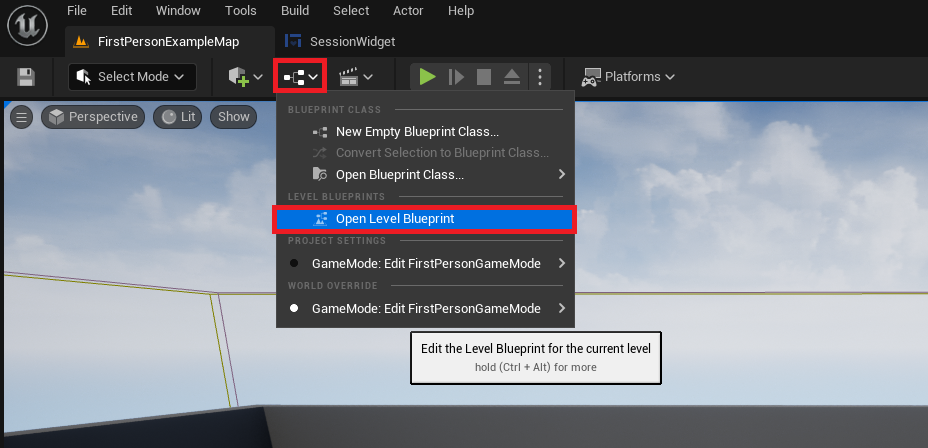
To make our widget show on the screen, firstly click the branch icon in the main editor window shown below.
In the drop down menu click Open Level Blueprint to open the Level Blueprint Editor.
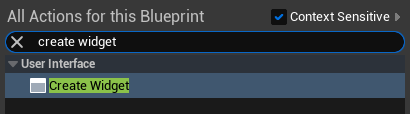
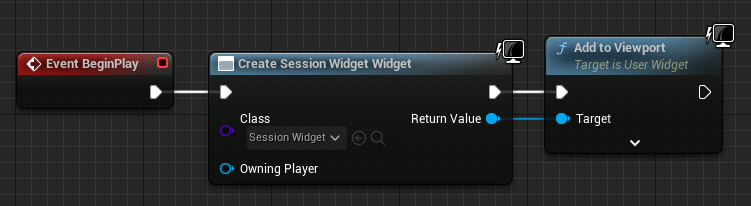
Right click anywhere and create the Event Begin Play and Create Widget blueprint nodes.
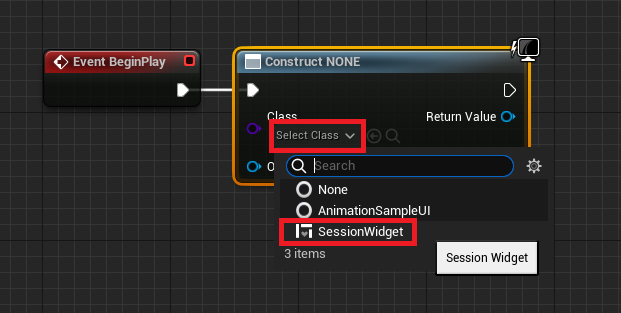
Connect the white pins together and select your widget in the Class drop down box.
In our case we named the widget SessionWidget to make it easy to find in the drop down box.
Lastly, create an Add to Viewport blueprint node and connect the blue pins together. This will create our widget and then add to the game screen.
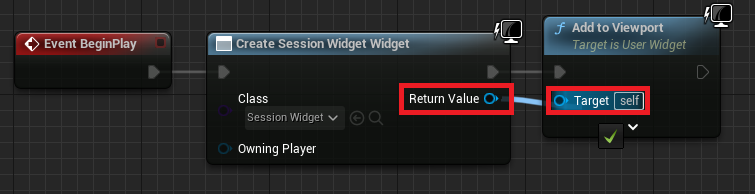
The final level blueprint should look like this.
Opening the Game Clients
For the last step we need to test our blueprint logic!
Unreal Engine 5 makes testing multiplayer in the editor extremely simple.
First, click the three dot button and, in the drop down menu, set Number of Players to 2. After that click New Editor Window to launch two windows of your game.
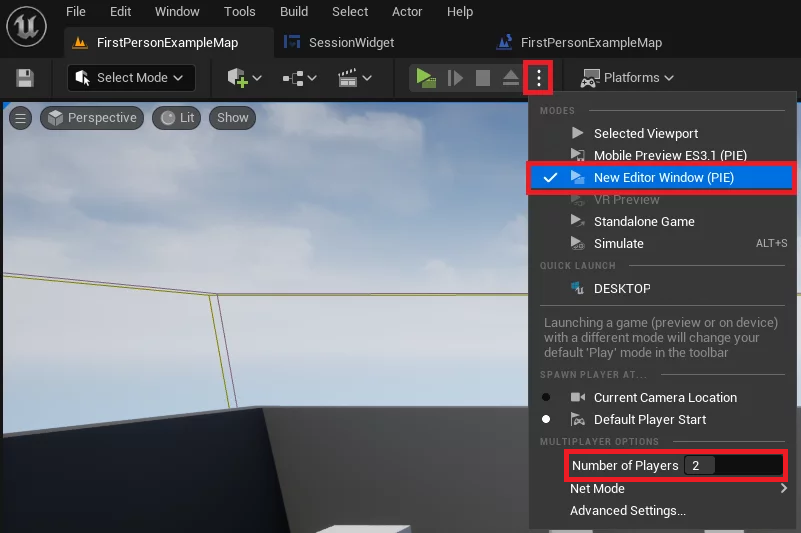
Once the two clients have loaded, click Create Session on one and Join Session on the other. After a short amount of time they will connect together in a multiplayer session!
As you can see in the demo below, the players can move around and see each other moving without any additional work! The template character in Unreal Engine 5 have multiplayer movement support out of the box.
Connecting to Sessions Outside your Local Internet Network
The session and listen server created in this guide can be connected to inside your local network by default and world wide through the internet with a few additional steps.
If you wish to host your session to global internet users, you need to port forward UDP/TCP 7777. Setting up port forwarding is different per router so check your specific router instructions.
If you don’t know what port forwarding is click here.
Download the Project Files
We create these free guides and resources on Game Development to give anyone the knowledge to make their own games. If you find these guides helpful please consider supporting us by purchasing our project files.
To improve your multiplayer sessions gameplay, we have bundled a session browser into the project files!
Conclusion
Your project can now create and join multiplayer sessions!
This guide was created to make the initial multiplayer setup as easy as possible. Unreal Engine 5 has extremely robust and powerful multiplayer tools to make any multiplayer game you want!
To learn more about replication and the session system, the Unreal Engine documentation is the best place to improve your knowledge about multiplayer development.
I tried this but it only works locally, any recommendations to make it work outside the local network with other players?
You will need to implement either Steam, EOS, or your own custom networking solution / master server system to get this system working over the internet. Also your server needs to be port forwarded if you aren’t using Steam or EOS.
Thanks for that, but doesnt work in real Movil (android) only works in PIE.