
From my previous projects one of the main suggestions that players asked for was to implement key/button bindings and an accompanying controls menu.
Why bother?
Hard coded keys or buttons limits the gameplay of some players as they prefer their own custom layouts. Swapping the jump input, the sprint input or the crouch input fixes this for most.
Giving your players access to this feature will improve the quality of life your players will have throughout the entire experience.
Improving the User Experience
The first step to having fully bindable key inputs is to use Input Actions and Input Axes for your game.
These features can inform the engine exactly which feature you wish to rebind e.g. Shoot or Reload. Saving this to the Input configuration file is then easy so remembering your custom settings after your players reload their games.
Finding the Input Settings Window
To find the input settings window, click on Edit and find the Project Settings option.
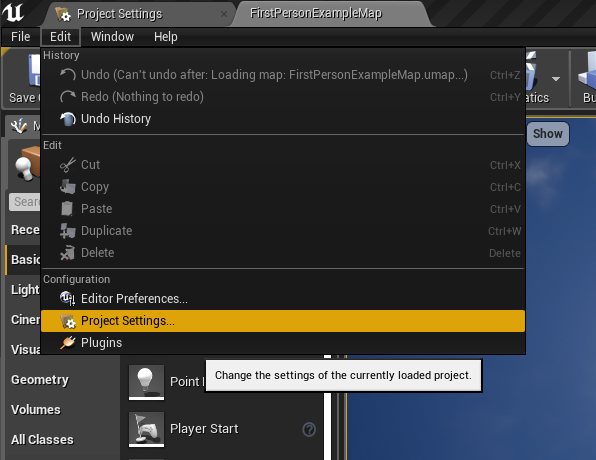
The Project Settings window will open up and look like this:

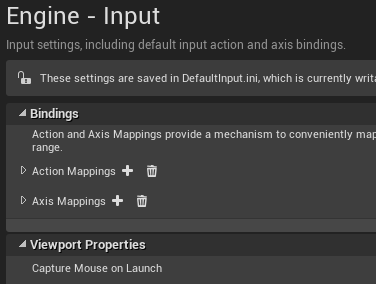
On the left hand side we can see all of the settings we can change in our project. Input contains what we need.

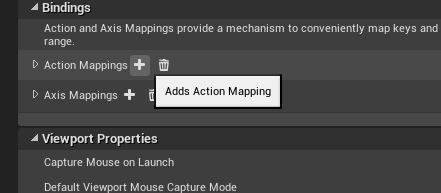
On the right section of the Project Settings window we will now see all of the input settings that we can change in our project.
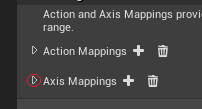
At the top you can see the two lists for Input Actions and Input Axis under the Bindings category
Action Mappings
What are Action Mappings?
Action mappings are inputs that only output execution pins. Triggering these events can run new lines of blueprint code.
Examples of Action Mappings
Action Mappings are perfect for single fire events such as reloading, jumping, crouching or shooting. Most inputs should use Action Mappings.
Creating your Action Mappings
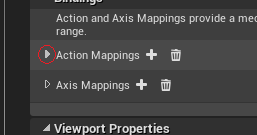
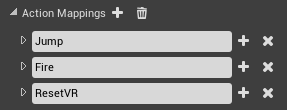
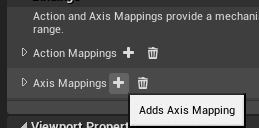
To see the list of current Action Mappings, press the triangle to the left of the Action Mappings text.
Here we can see all of the Action Mappings that my project uses. These are the defaults that come with the FirstPersonShooter template.
To create a new Action Mapping press the + icon next to the Action Mappings list.
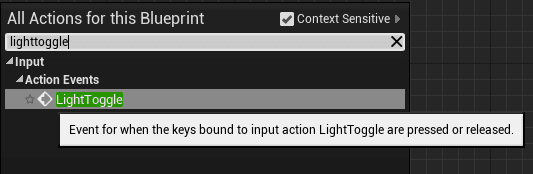
Give the new Action Mapping a name that relates to what you want to use it for. In this case I named mine LightToggle as I am going to use this input for toggling lights in my level.
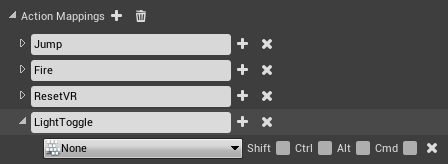
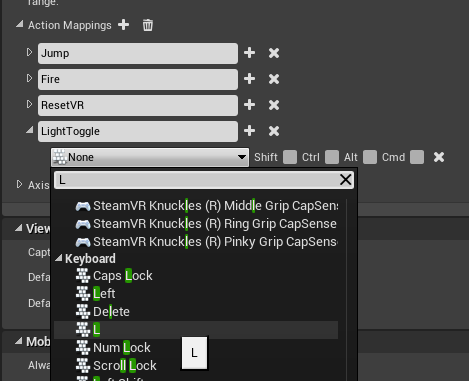
From here you can now click the drop down box that current says None and select the key that you want this Action Mapping to use.
Shift, Control, Alt and or Command have modifier boxes to the right that can also be ticked to make your input only work if they are pressed at the same time.
To add multiple input keys you can press the + symbol next to the name of the Action Mapping. This adds one extra key that will cause this event to trigger

Adding Functionality
Now your Action Mapping’s are fully setup. Type the name of your Mapping inside your character or pawn blueprint event graph to get an event.
To use your new mapping in a non character or pawn blueprint, you will need to use the enable input node on begin play for that actor.
This is due to actors not receiving input events by default
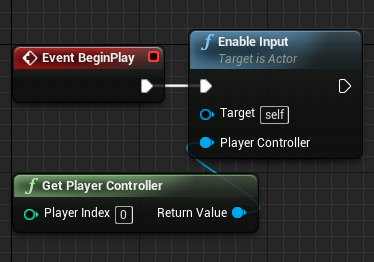
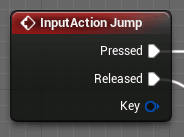
This fires when your custom input is pressed or released.
Input Action Event Testing
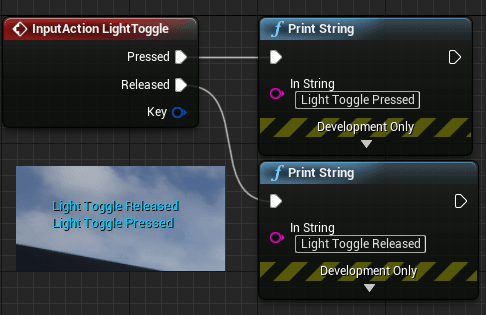
To make sure that this input works I have attached two print string nodes to the InputAction. This prints “Light Toggle Pressed” when LightToggle input is pressed and “Light Toggle Released” when LightToggle is released.
Axis Mappings
What are Axis Mappings?
Axis Mapping’s outputs a single execution pin every frame and also outputs a float value that is set by specific keys/buttons, control sticks or mouse inputs.
Different code can be run on the Axis value as each axis value is assigned is set to a different key.
Examples of Axis Mappings
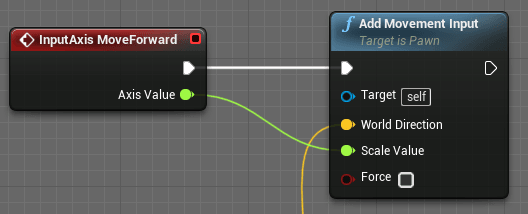
One example of this is the first person character template movement code.
Pressing no keys outputs 0.
Pressing the A key sets the float output to -1 and moves the player left.
When the player presses D the player moves right due to the float output being 1.
This output sets the scale of the add movement input function.
The axis value is used for the mouse input to control the camera of the first person character.
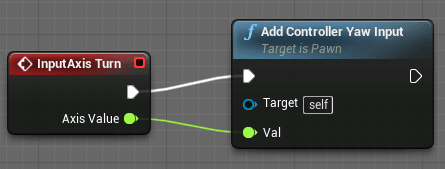
The horizontal movement of the mouse is converted to a float based on the direction and speed of the mouse and is sent to add controller yaw input to rotate the character.
Creating Axis Mappings
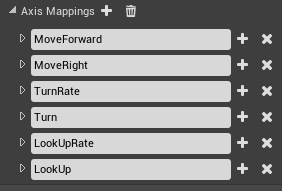
To see the list of current Axis Mappings, press the triangle to the left of the Axis Mappings text.
Here are all of the Axis Mappings that my project uses. These are also the defaults that come with the FirstPersonShooter template.
To create a new Axis Mapping press the + icon next to the Axis Mappings list.
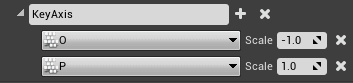
Axis Mappings contain a float which outputs when your specific key is pressed.

I have assigned O to -1 and P to 1 in my Axis Mapping named KeyAxis.
Adding Functionality
Axis Mapping are now setup. Typing the name of the newly created Mapping, inside of any blueprint event graph, shows an event that will fire your custom float value when your specified input is pressed.
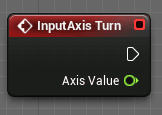
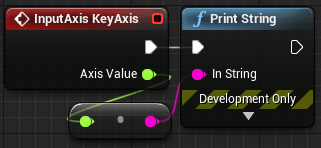
As a result we can now see two different blueprint nodes when looking for your InputAxis.
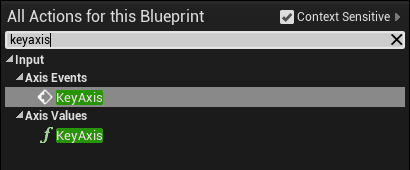
The first in the list gives you the event execution pin that fires every frame and the output float called Axis Value.

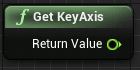
The second in the list gives you just the output float.
Input Axis Event Testing
To test, add a print string node to the execution pin of the KeyAxis event. Set the string value to the Axis Value from the output float from the event.
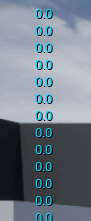
Without pressing O and P the print outputs 0 every frame.
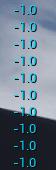
Holding O prints this result:
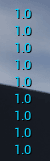
Holding P prints this result:
Conclusion
Unreal Engine’s robust input now is fully working. Therefore, in the future, input can be rebound to different keys based on the users preference.
Hard coding input causes difficulty down the road with every blueprint. Hard coded binds cannot be changed during runtime.
It’s worth getting into the habit of settings these up for every input you want to use for your games.
“Type the name of your Mapping inside of any blueprint event graph to get an event.”
This doesn’t seem to be true. When I try to use the action mapping in Game Mode blueprint, it doesn’t fire. In other blueprints it does.
Any idea why is that?
I would like to have my input login in the game mode.
I mean input ‘logic’
Actors that aren’t possessed by the player controller will not inherit input automatically.
To fix this add an enable input node and connect your player controller to it. This should fix the input issues you are having.
We missed this out in the guide and have just updated the guide showing how to use non character blueprints with input. Thanks for pointing this out!
Thanks Matt,
I used Enable Input node in Game Mode and now input action works fine for me. I was looking for this answer all over the internet.
But why doesn’t “Input Action” work without this node as it works in level blueprint. Does it cost any performance degradation?
That does sound like it most likely has a performance impact.
Have you tried to disable the consume input box on the input action you are trying to use?
The input system is a priority stack and the highest priority will get exclusive use of that input.
https://docs.unrealengine.com/Images/Gameplay/HowTo/ActorInput/Blueprints/input_9.webp
On the Unreal Engine documentation it shows examples of the input enable and disable steps in more detail: https://docs.unrealengine.com/en-US/Gameplay/HowTo/ActorInput/Blueprints/index.html
This is a bit too difficult to grasp. It’s hard to understand the layering/ layout of the blueprint process without seeing the whole screen (Node/ axis mapping-web) and how each picture fits in said web / whatever blueprint level.
Appreciate the breakdown of each process but by not showing a large view of each step in the process and how they relate/ connect with another node (box/ axis mapping box) in a ‘single’ picture.. It’s hard to understand where to start if you’re a rookie
Thanks for the feedback. I will update this guide with improved images.