
Data tables are a useful feature of Unreal Engine 5. They allow the programmer/designer to create and access a pre-made list of information.
When creating a data table you are asked to choose which struct you want to base the data table on.
Here are a few game mechanic uses of data tables:
- RPG item data table that contains item stats such as damage, armour etc.
- Subtitles for dialogue that can easily be accessed by character name.
- An enemy data table containing a list of pre made enemy types with enemy health, damage, stamina etc.
In this guide we will be showing you how to use Data Tables in your Unreal Engine 5 game.
Pre-requisites
To use Data Tables in Unreal Engine 5 you will need to know how to create and use structures.
Click here to read our guide on structures.
It would also help to know how to create and use an blueprint enum.
Click here to learn about enums in Unreal Engine and how to create them in your project.
What is a Data Table?
In Unreal Engine 5, a Data Table is an extremely useful tool that allows you to define a list of data and store different values for this defined list based on a key.
This data is stored as an asset in your project which makes it incredibly easy to retrieve and update the data from anywhere in your code.
The data is also remembered inside of the editor meaning you can create your data while you are developing your project, then use the data inside of your project during runtime.
A great example of this is data for items or enemies in your project. This data can be set by you when designing your items and enemies which is then saved and persistent.
Making and using Data Tables in Unreal Engine 5 is easy and requires very little work. In the next section we explain how to make your own data table inside of your Unreal Engine 5 project!
Making our Data Table
Creating an Enum
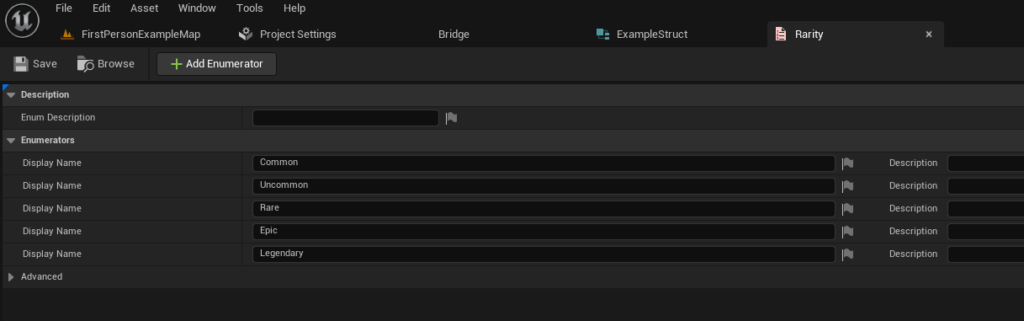
Before we create our struct, we need to create an enum. This is an item rarity enum which will represent the quality of our role playing game item.
Simply create your enum by right clicking the content browser and clicking Enumeration in the Blueprint category.
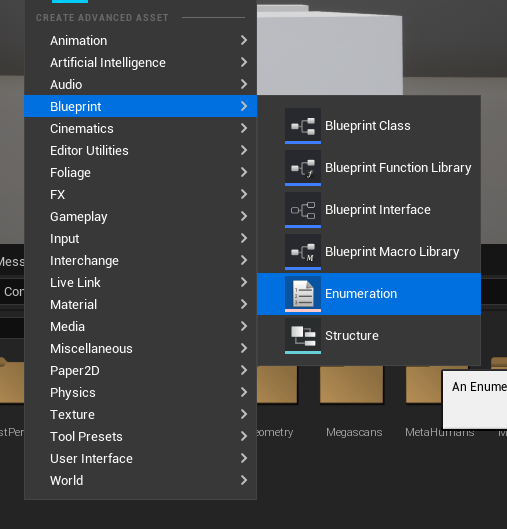
Then set the values as shown that you require. If you are following along with this guide, copy the values in the image below.
Creating our Struct
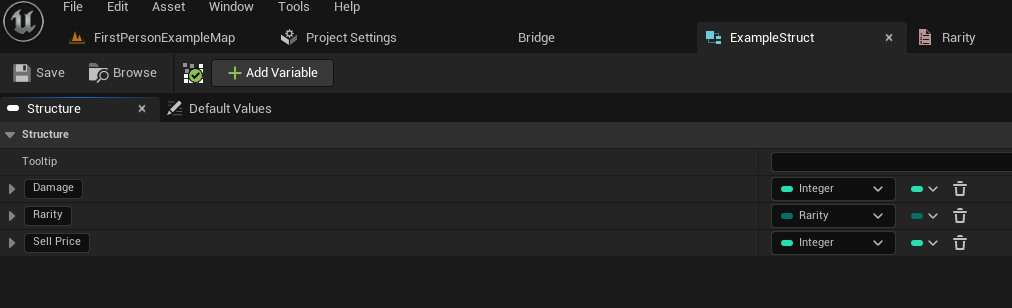
Now that we have our enum created, next we need to create the struct that our data table will use for the types of values it will hold.
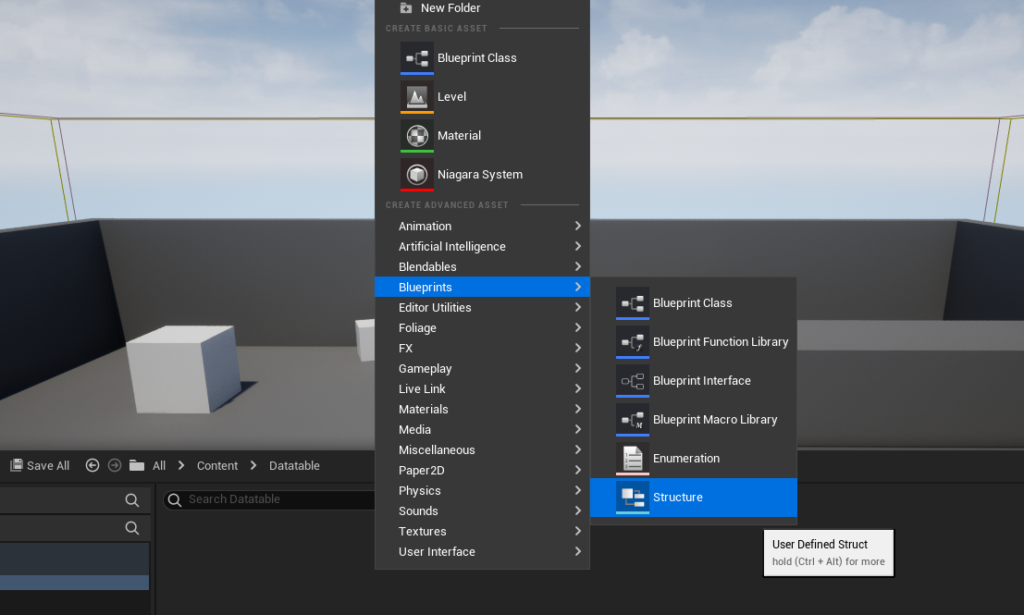
Right click anywhere in the content browser, then click Structure in the Blueprints category.
Then set the values as shown that you require. If you are following along with this guide, copy the values in the image below.
Creating our Data table
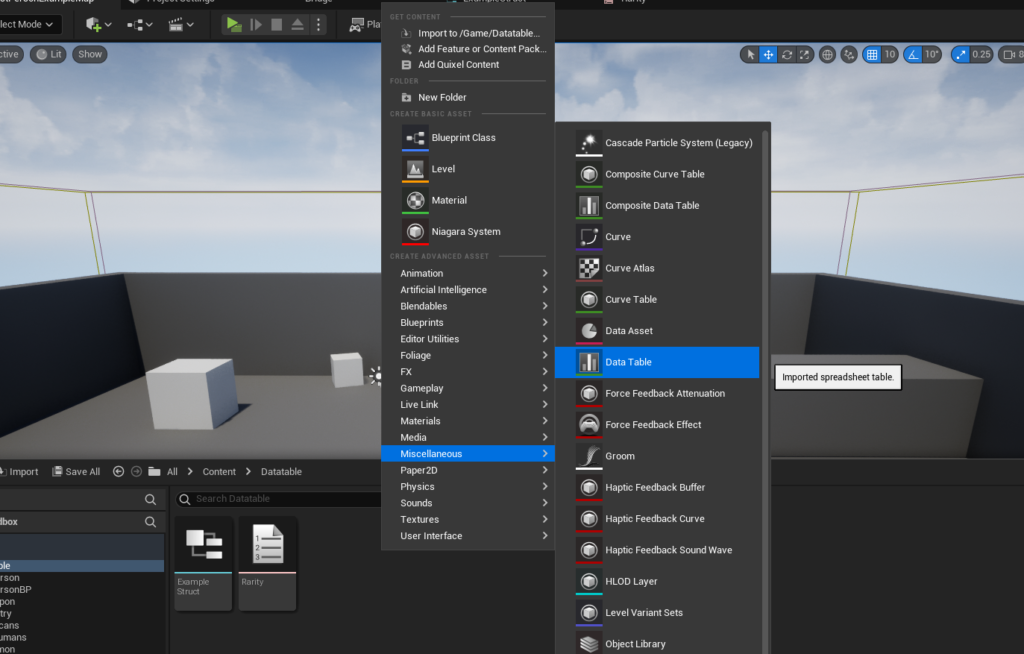
Finally we can create our data table. This is done exactly the same way by right clicking inside of the content browser and clicking the Data Table option in the Miscellaneous category.
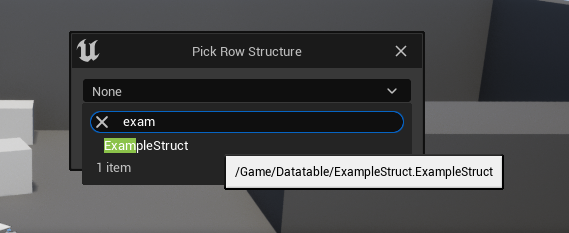
Next there is a popup asking which struct you want to use. In this guide we are using the ExampleStruct we made earlier.
Adding Values to the Data Table
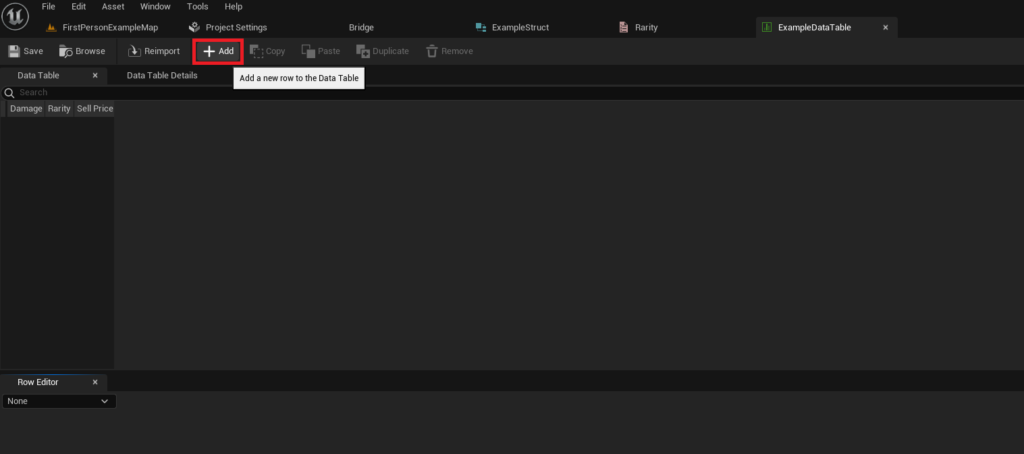
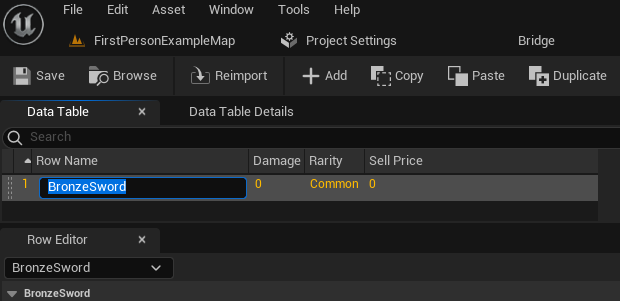
Now that are data table is created and configured correctly, we can press the Add button to add a new row to our data table.
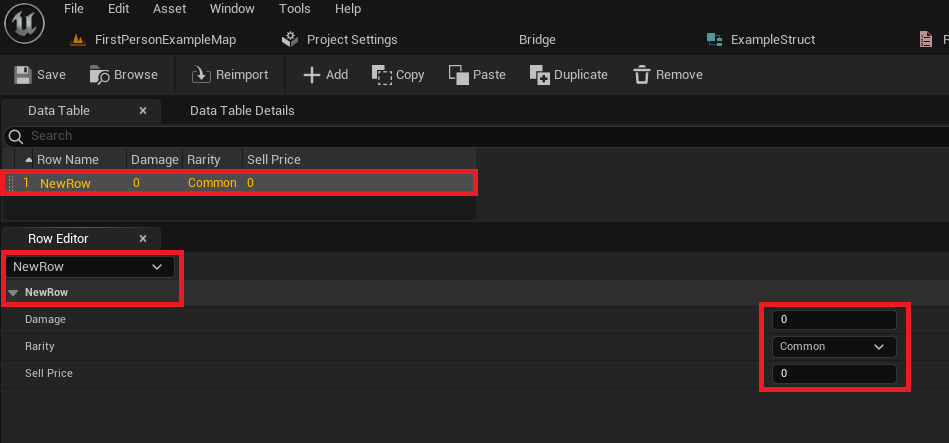
As you can see in the image below, the data table has a new row with some default values from our struct.
We can change the values in the “Row Editor” and the values in the data table will change above.
We can now create as many entries as we want!
Clicking the row name section in the row, we can change the row name. In this example we are using BronzeSword as the new row name.
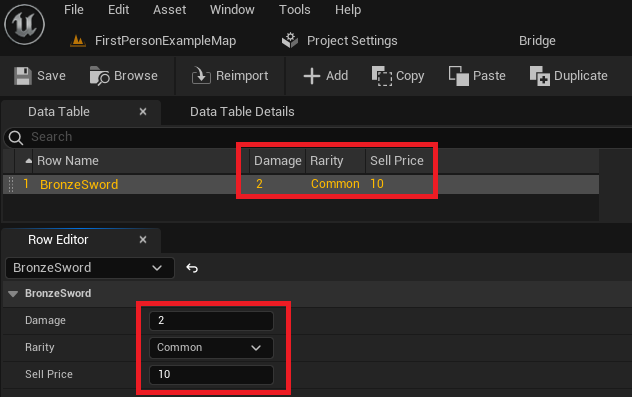
The Damage, Rarity, and Sell Price values we defined earlier are in the Data Table view, and the Row Editor below.
Changing the values in the Row Editor will affect the values stored in the data table.
Don’t forget to Save often to prevent losing your changes!
Using your Data Table
Now that we have our data table created, configured, and filled with data, we can now learn how to access this data in our code.
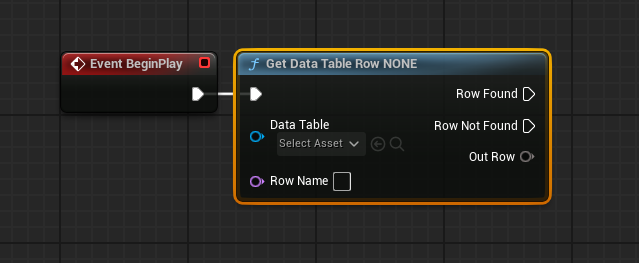
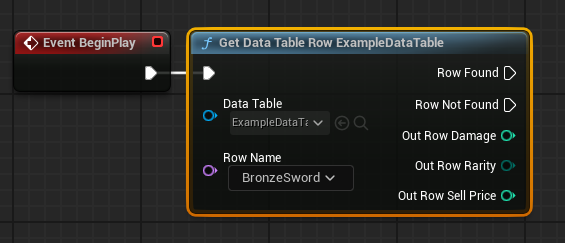
We have create an Event BeginPlay node to our level blueprint and have created a Get Data Table Row node.
This Get Data Table Row node asks for a data table asset reference, and a row name.
Data Table reference is our data table we created earlier, and the Row Name is the row we want to try to find the data for.
If the row is found, the Row Found pin will run code and the Out Row will contain our data, if the row is not found, the Row Not Found pin will run code and the Out Row data will be invalid.
We can set the Data Table reference by clicking on the select asset drop down and selecting our data table from the list of assets.

Now we can split the Out Row struct by right clicking and clicking Split Struct Pin in the menu. This will split our struct into all the types and values in contains for easy visibility.
We can also see that our Row Name is now a drop down that contains all the available row names. This can be overridden by connecting a value to the Row Name pink pin.
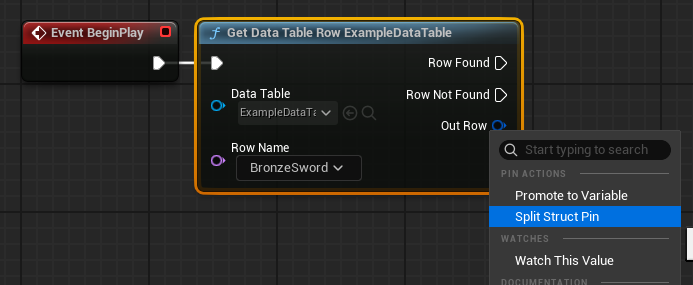
Now that we have split our Out Row struct, we can see the Damage, Rarity, and Sell Price values we set earlier.
Looping over your Data Table Rows
Now that we can access a specific row in our data table, it is essential to know how to use a loop with a data table.
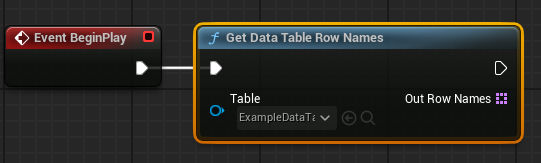
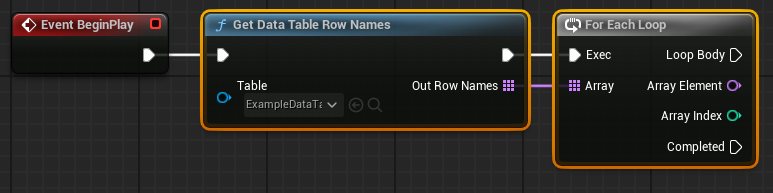
In the example below we have created a Get Data Table Row Names node. This returns an Array with all of the row names inside of the data table.
We can then connect this to a For Each Loop node. This will now run the Loop Body for each Row Name in the Out Row Names from our Data Table.
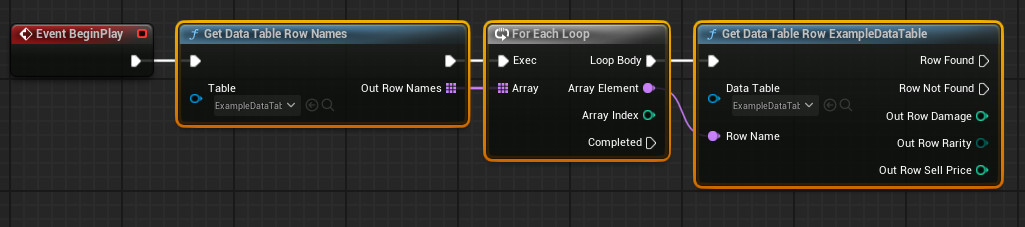
Finally connecting our For Each Loop into a Get Data Table Row like before, we can then connect the Array Element pink pin to the Row Name pink pin.
This will now get the data for that row name each time the loop runs.
We can then use the Out Row values however we want in the project!
Conclusion
Now you have learned how to create, configure, populate, and implement data tables in your Unreal Engine 5 project!
Almost every Unreal Engine project benefits from using a data table to efficiently and neatly store data for use within the systems you develop.
Working collaboratively using data tables makes sharing a single source of truth for your projects data simple and does not require any C++ knowledge!
Leave a Reply