
An essential part of developing games with Unreal Engine 4 is learning Custom Events.
Custom events are used to run a set of blueprint nodes on demand.
Custom events are different from Functions as they can contain delay nodes and are created in the event graph.
In this guide we are learning how to create, setup and call custom events in Unreal Engine 4.
Creating the Custom Event
To create a custom event, right click anywhere in your actor’s event graph and write “Custom Event”.
Then click “Add Custom Event”.
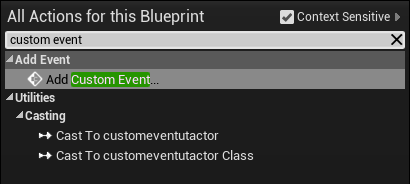
Once created, name the new custom event.
It’s good practise to name your custom event based on its purpose.
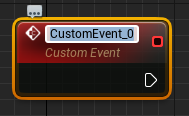
Your event has now been created!
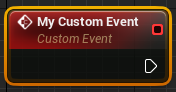
For this guide we named our custom event “My Custom Event”.
Adding Inputs
Similar to functions, custom events can have input variables attached to them.
These are used to send information to the nodes running from the custom event.
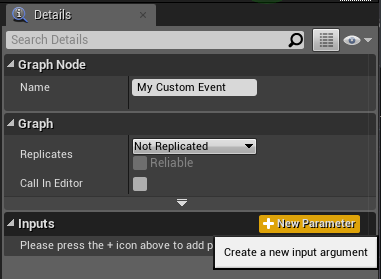
To add an input firstly click your custom event in the event graph and look to the right side of the screen.
Click the “New Parameter” button shown below to add a new variable to the inputs list.
Then change the name of the input. The left side text box is the name that will be displayed inside the custom event.
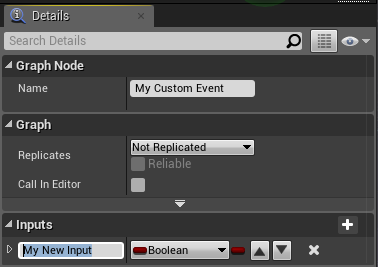
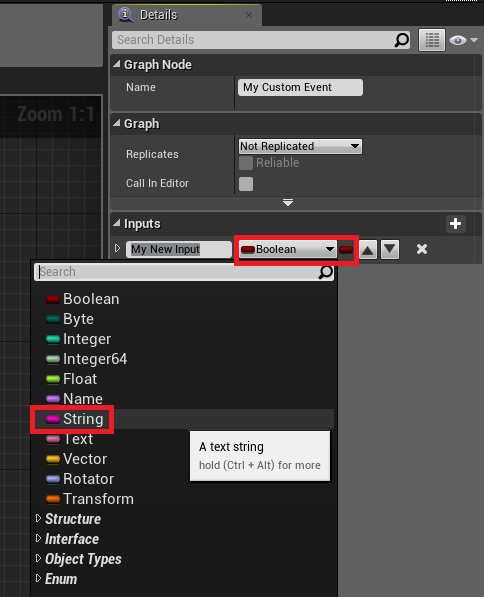
On the right side we can then change the input variables type.
We are changing this variable from Boolean to String. This means we can use text values in our input.
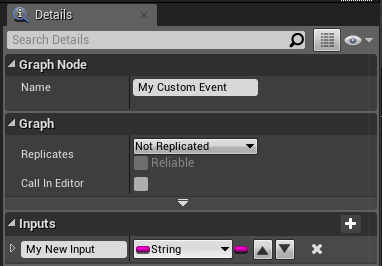
The finished custom event input should now look like this.
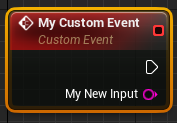
The custom event in the event graph will now look like this.
Using your Custom Event
Now that are custom event is created and the input variable has been setup, we can now create a “Print String” node to display the value of “My New Input” on the screen.
This is the easiest way to test if the custom event is working correctly.
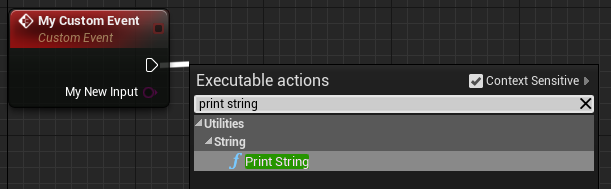
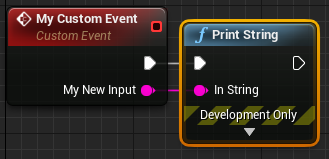
Once the “Print String” node is created, connect the “My New Input” variable from your custom event to the In String pin on the Print String node.
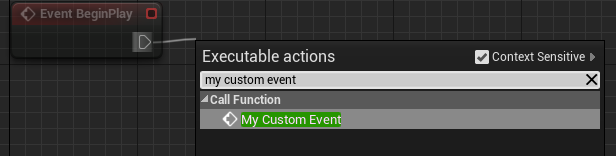
To run your custom event simply create a “Event BeginPlay” node, drag from the execution pin and type the name of your new custom event. In our case this is “My Custom Event”.
As your custom event is connected to an execution pin, it is now being called by the other event.
Now that your custom event is being called by the BeginPlay event you can see the input variable.
This input variable pin can be connected to any variable with the same type.
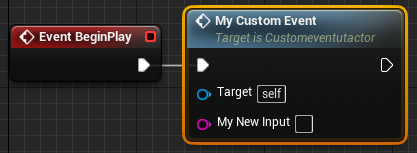
We can now write any text into the My New Input variable.
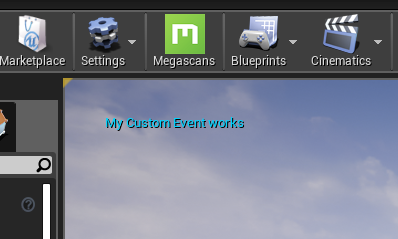
Testing the Custom Event
Running the game will now show the text that we wrote in the custom event.
Conclusion
Now you have the knowledge to create and use custom events in Unreal Engine 4!
Custom events are an essential component of Unreal Engine and are especially important for multiplayer game creation using blueprints.
Below are a few links for the full custom event documentation and a guide for using custom events and other Unreal Engine 4 features to make a multiplayer damage and health system.
Click here to read the official documentation on Custom Events in Unreal Engine 4
Click here to see our guide on making a multiplayer ready damage and health system with custom events.
Leave a Reply