
In this guide we will be showing you how to play your UE5 game on your Quest 2 Headset.
Unreal Engine 5 has great support for Virtual Reality applications and headsets through many years of new technology and improvements.
Getting your VR game running on Meta Quest 2 has never been easier.
Before we begin
To ensure Quest 2 will work correctly with your project, you must make sure that your project is ready for VR. This means your character or pawn has motion controller components and a camera that has Locked to Hmd ticked.
For this guide, to make this easy, we have created a new project using the Virtual Reality template as it is completely configured to play with a virtual reality headset.
With only small tweaks we can launch this project using the Meta Quest 2.
You will also need Android SDK, NDK and ADB setup for Unreal Engine. Click here to read the official Unreal Engine documentation on setting up Android SDK, NDK and ADB in your UE5 editor.
Setting up your Project for Quest 2
Enabling the Plugins
To make sure the Quest 2 will work correctly with your VR project, you need to enable the Oculus VR Plugin.
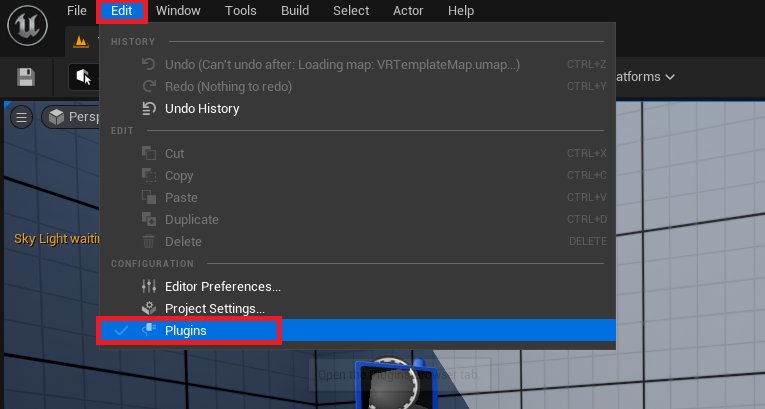
In the main editor window, click Edit and Plugins to open the Plugins window.
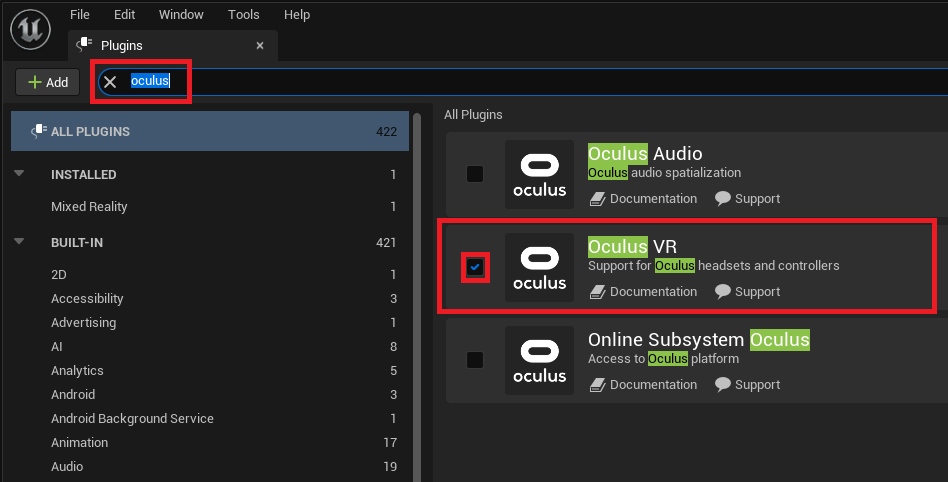
Next, in the search bar type Oculus. On the right side make sure the Oculus VR plugin is enabled.
Configuring the Project Settings
To allow Quest 2 compatibility and best performance, we need to change a few of the project settings.
To access these settings, in the main editor window click Edit and Project Settings.

Input Settings
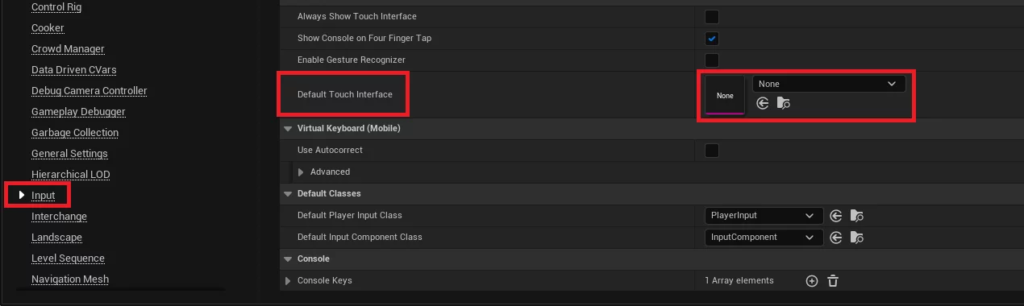
On the left side find and click the Input category. On the right side, scroll down until you find Default Touch Interface.
Click the dropdown and then click clear. This will set the value to None.
Rendering Settings
Next we need to change the rendering settings.
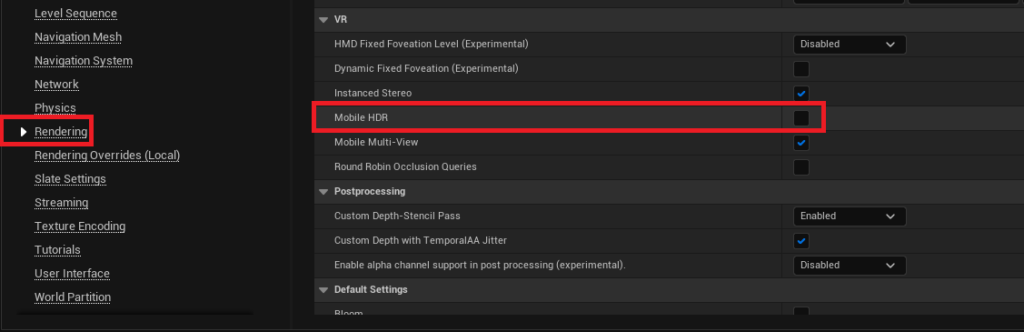
On the left side scroll down and click the Rendering category.
On the right side scroll down to the VR category and disable Mobile HDR.
Android Build Settings
Lastly, in the Platforms category on the left, click the Android sub category.
On the right side scroll down and click the Configure Now in the large red banner.

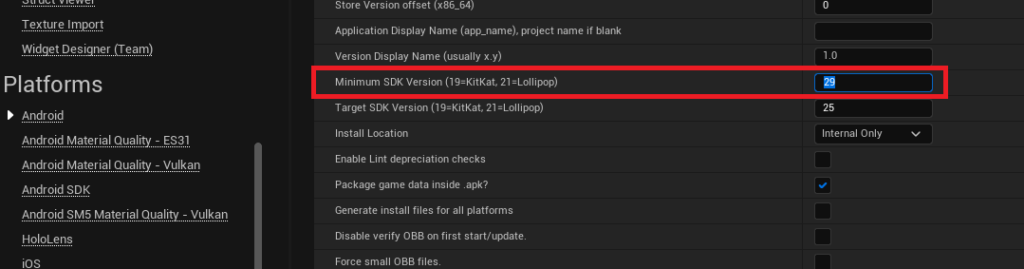
Next, scroll up and find the Minimum SDK Version. Set this value to 29.
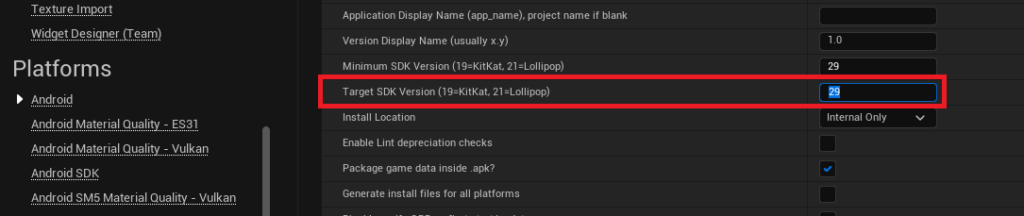
After that, set Target SDK Version to 29.
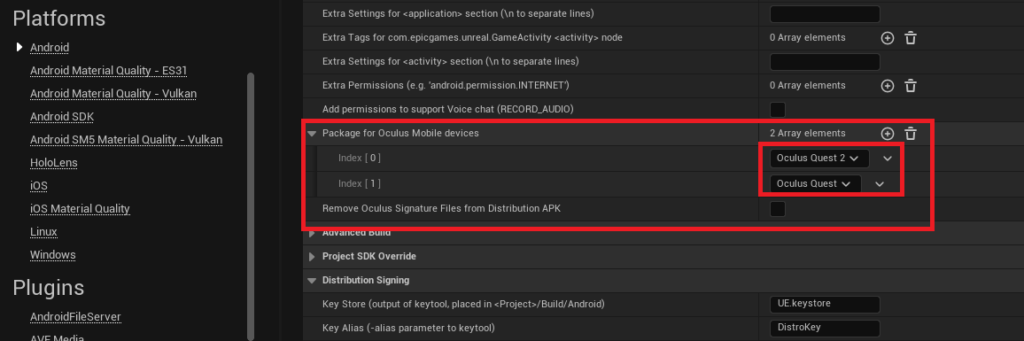
Lastly, scroll down and open the Package for Oculus Mobile devices category.
Add two options and select Oculus Quest 2 and Oculus Quest as shown in the image below.
Packaging and Launching your Game
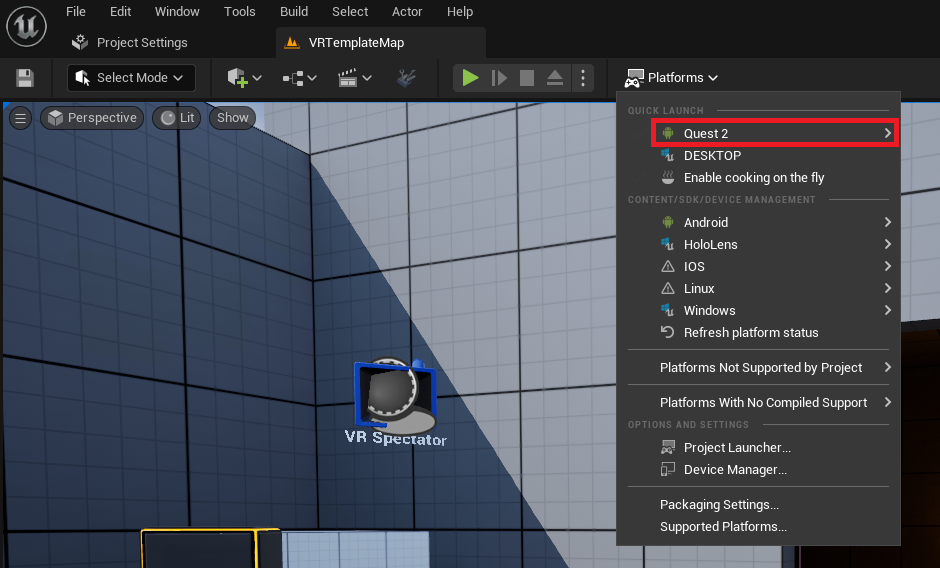
The last step required to run your Unreal Engine 5 project on your Quest 2 is to click the platforms drop down and select your Quest 2 in the options.
If your headset doesn’t show in the list, make sure it is plugged into your PC and is powered on.
Your project should then start packaging and building for the Android Quest 2 platform.
Once this process has complete your project should immediately start up on your Quest 2 headset.
Conclusion
Your project is now compatible with standalone virtual reality on the Quest 2 headset!
More optimization might be required to reach 72 or 90 frames per second. To reach these performance goals there are many resources online:
Official Unreal Engine optimization documentation: https://docs.unrealengine.com/4.27/en-US/TestingAndOptimization/
Unreal Engine performance guide by GPUOpen: https://gpuopen.com/unreal-engine-performance-guide/
Official Unreal Engine virtual reality performance and optimization guide: https://docs.unrealengine.com/4.26/en-US/SharingAndReleasing/XRDevelopment/VR/DevelopVR/ContentSetup/
This tutorial is for unreal engine 4, not unreal engine 5, for which oculus vr is unfortunzteky replaced by openxr. I say “unfortunately” because we lost some data in the change, like the angular and linear accelerations, which represent 30% of the pose information and even 100% of it when the handler is untracked by the headset.