
Motion controllers are an important feature of modern virtual reality game design.
Interacting with Widgets using motion controllers in Unreal Engine 4 is easy and requires very little changes to your existing Widgets and character actors.
In this guide we will be creating a motion controller compatible VR Interactable UI Widgets in Unreal Engine 4.
Prerequisites
To follow this guide we recommend you know the basics of Unreal Engine 4, using the widget UI system and basic knowledge of blueprints and actors.
This guide uses the UE4 VR Template built into Unreal Engine 4.
To follow along exactly to the guide you will need to create or use a project that was created using the VR Template.
Click on the links below to learn about these topics:
– Creating and using Widgets in Unreal Engine 4
– Blueprint basics in Unreal Engine 4
Creating the Widget
The first aspect of this system is the creating the widget itself.
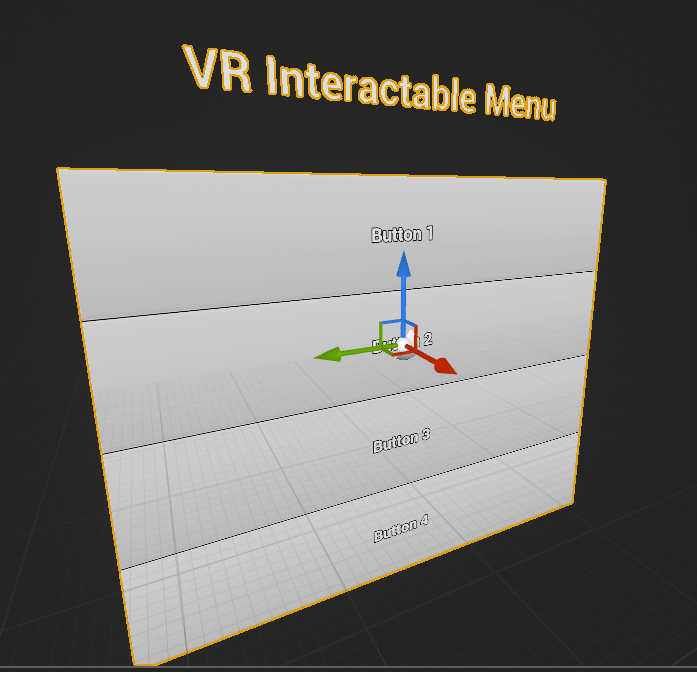
The widget we are creating is a main menu style widget that has a vertical list of buttons.
If you already have a completed widget you can skip to the “Displaying the Widget” section.
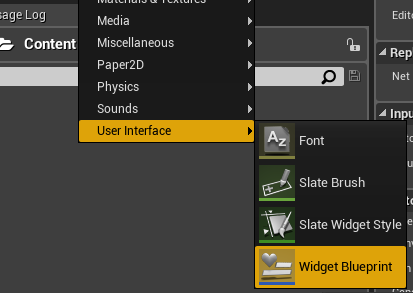
Firstly, right click in the content browser and create a new widget blueprint.
Creating the Menu Title Text
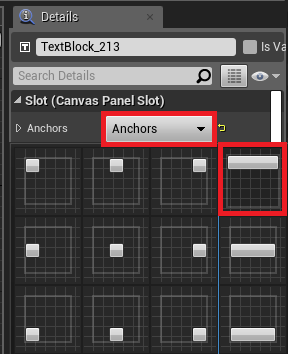
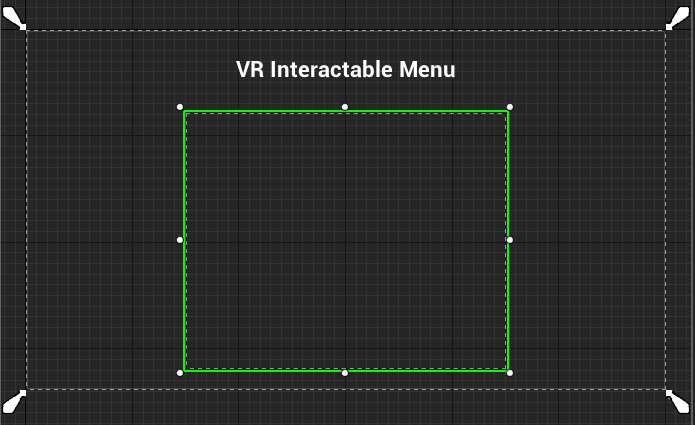
The first widget component to add is a text block that is set to the anchor shown below.
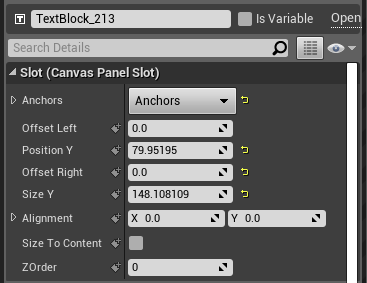
Then, align the text to the top and automatically adjust it’s horizontal size to the maximum size of the widget.
This is done by setting the slot position values shown below.
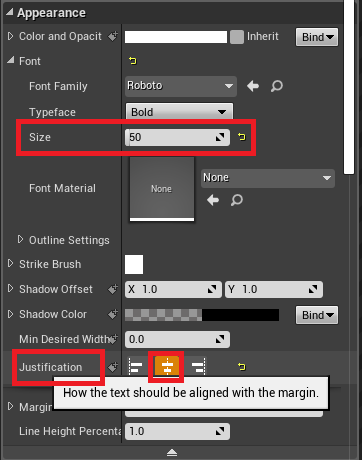
The last step with the text is to set the font size to 50 and the justification to center as shown below.
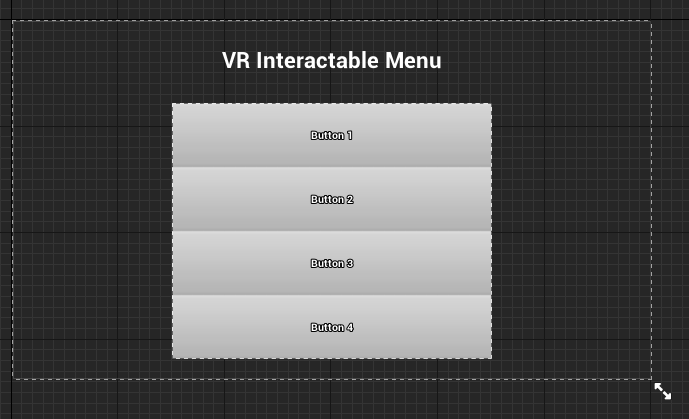
Creating the Button Container
We will now create the main container that will store our interactive buttons.
To do this, firstly create a vertical box widget component.
Then, add as many buttons as you require to the vertical box.
This stacks the buttons and equally spaces them out in the vertical box.
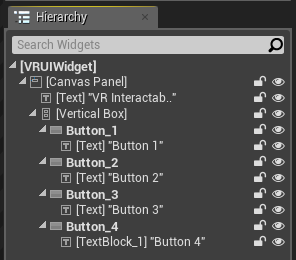
The final widget hierarchy now looks like this:
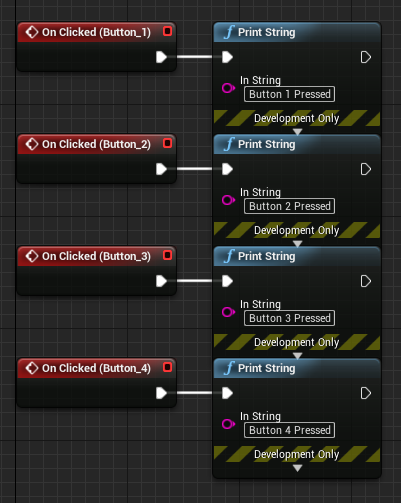
Adding Functionality
To make sure our buttons are working correctly in game, we simply add “On Clicked” events to each button and print string nodes with the button’s number as the input.
This will print the value on the screen once interacted with the VR controllers.
Displaying the 3D Widget
Creating the Actor
To place our newly created widget into the world, create a new actor.
For this guide we named this actor “VRWorldObject”.

Adding the Widget Component
To add a widget into this actor, create a new “Widget” component.
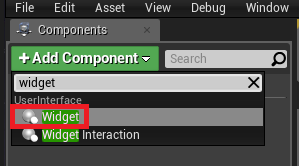
To show the Widget component’s settings, click on the component in the components menu below the add component button.
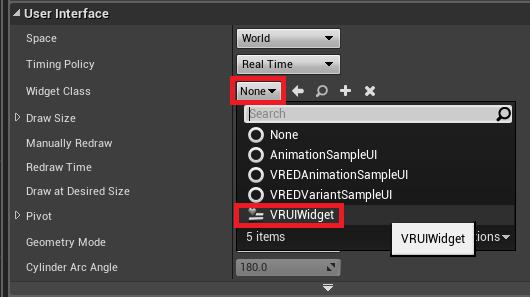
In the widget class drop down box select the widget we created earlier. In this case we selected “VRUIWidget”.
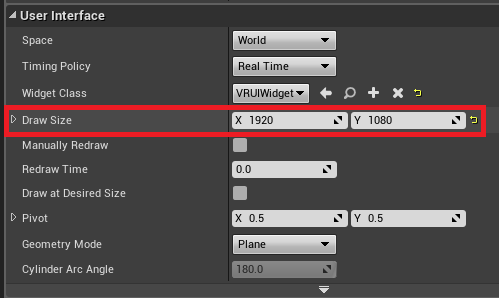
Internally the widget is rendered into a texture. To make your widget draw with a high resolution, set the Draw Size X value to 1920 and the Y value to 1080.
Lower values will still work but will display lower resolution and pixelated widgets in the game world.
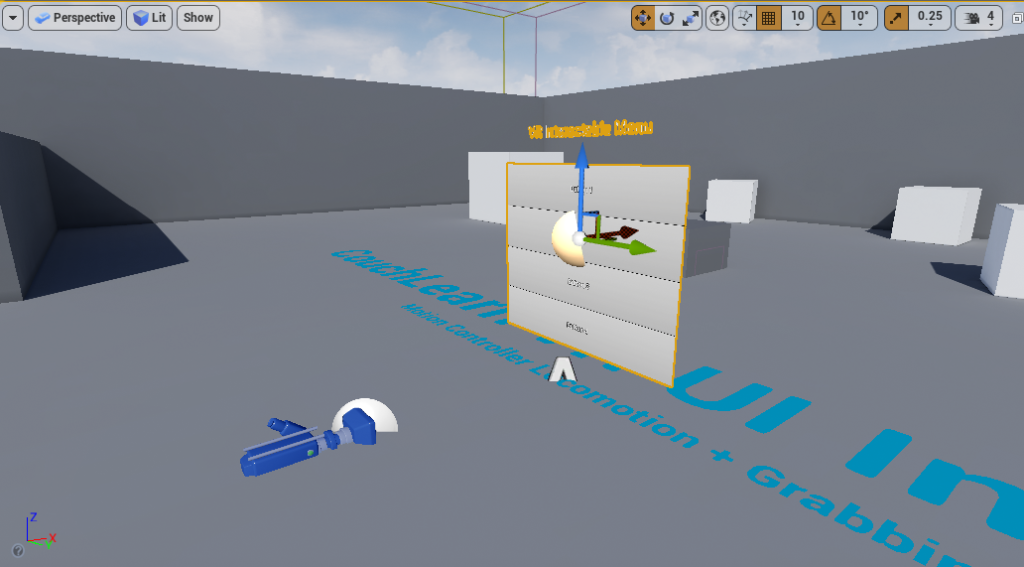
Now in the viewport of the blueprint editor you can see your widget rendered.
Now your widget actor is complete! Drag this actor from the content browser into any level to show the widget in the world.
Interacting with the 3D Widget
By default world space widgets inside of actors cannot be interacted like standard widgets.
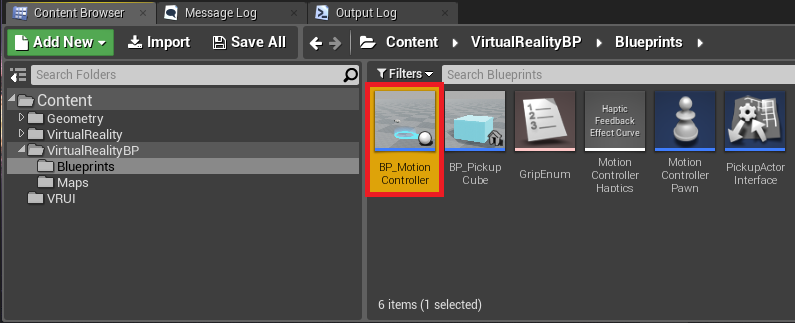
To allow interactions, firstly open the BP_MotionController blueprint.
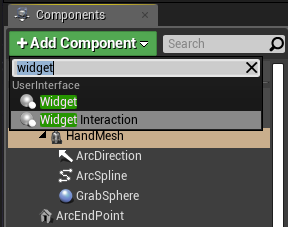
Inside the BP_MotionController blueprint, add a new “Widget Interaction” component to the HandMesh skeletal mesh component.
This makes sure that the interaction component will follow the movement and the rotation of the VR controllers.
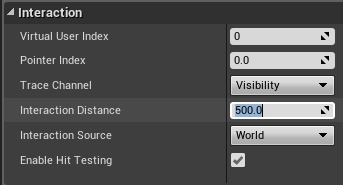
Then, click the Widget Interaction component to show it’s settings and adjust the interaction distance to however far away you want the players to interact with the widgets.
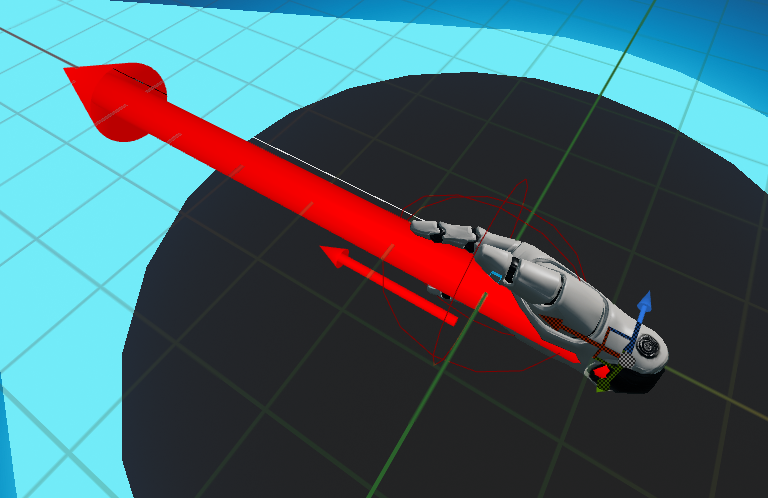
Now in the viewport you can see the widget interaction arrow displaying the interaction distance and the direction it is pointing in.
This can be adjusted by changing the component’s location and rotation values.
To show a laser pointer like line where the controller is interacting, simple enable the “Show Debug” checkbox in the Debugging section of the WidgetInteraction component.

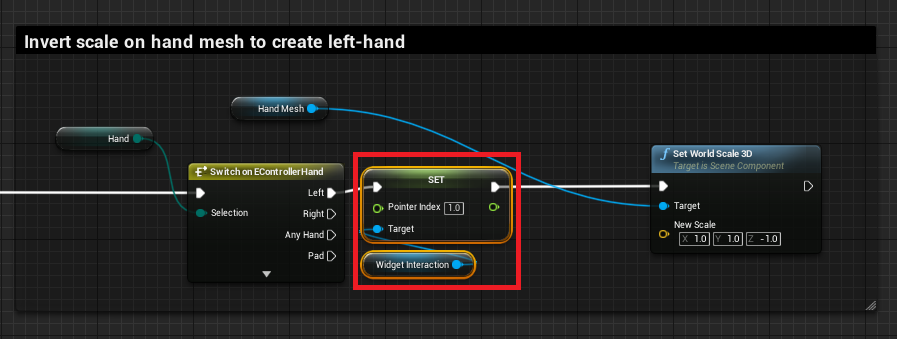
Lastly, to differentiate between the two controllers the engine uses the “Pointer Index” variable on the widget interaction component.
In the Invert Scale on hand mesh to create left-hand section of the MotionControllerBP blueprint add a “Set Pointer Index” node and set the value to “1.0” as shown below.
Interact with the VR Controllers
The BP_MotionController blueprint has the interaction enabled but cannot click or select any widgets.
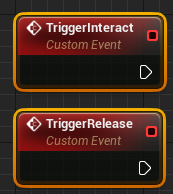
To achieve this, firstly right click in the event graph of the BP_MotionController and create two new custom events named “TriggerInteract” and “TriggerRelease”.
If you haven’t used custom events in Unreal Engine 4 click here to learn how to use custom events in your game.
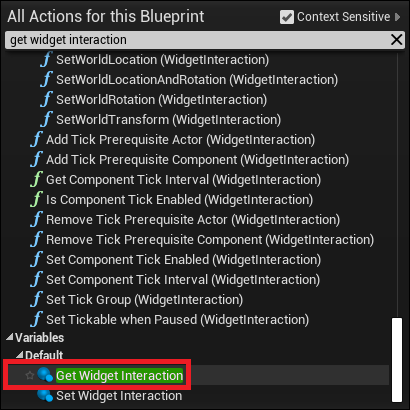
To trigger a click / select event in our Widget Interaction component, right click and get the Widget Interaction reference.
Then, click and drag from the Widget Interaction pin and create a Press Pointer Key function.
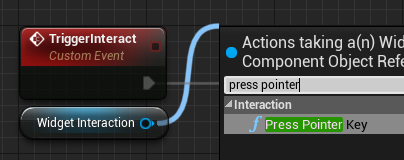
Change the key to Left Mouse Button to allow the “TriggerInteract” event to click and release the left mouse button interaction on the widget.
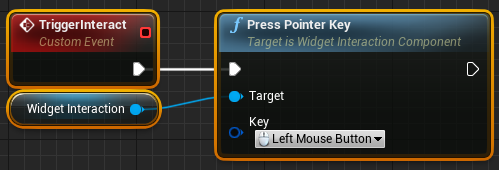
Repeat this for the “TriggerRelease” event but use the Release Pointer Key function instead.

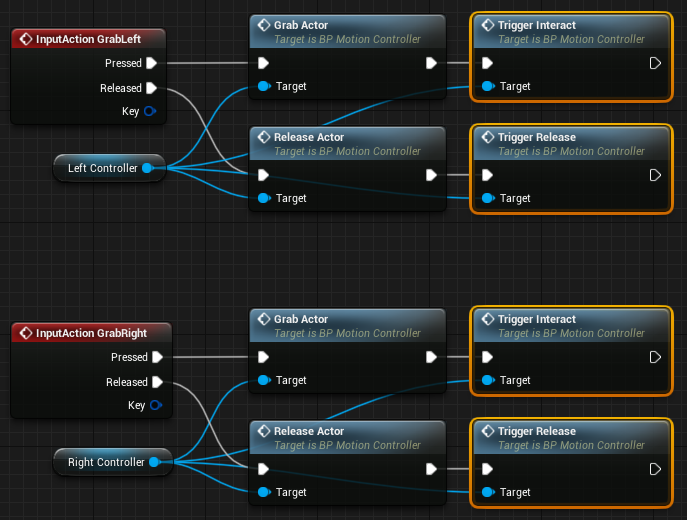
Finally, in the MotionControllerPawn blueprint call our new event from the “LeftGrab” and “RightGrab” input actions.
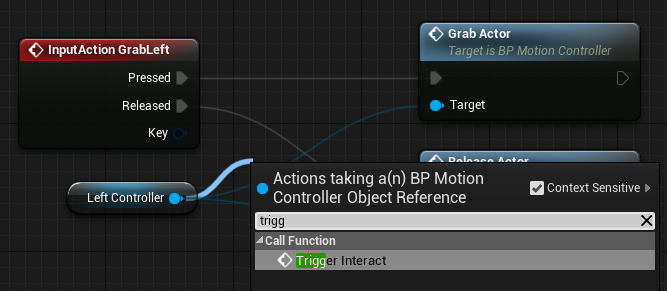
The finished input blueprint nodes in the MotionControllerPawn should now look like this.
Your basic VR widget interaction system is now complete!
Demonstration
Project Files
Conclusion
Now your project has basic VR compatible widget interaction!
We are planning to create many more VR guides over this year. If you have a specific topic you would like a guide for, feel free to contact us.
If you are interested in more Widget Interaction and 3D widget features in Unreal Engine 4, here are some links for further reading:
Click here to read the 3D widget Unreal Engine 4 documentation.
Click here to read the Widget Interaction Unreal Engine 4 documentation.
my text on top of the buttons disappears when i play in preview, any idea why?
Probably went hovereds, you have to the panel or something , sets in front of the text, verify i thing the variable is call Z priority or some…
Using this method, should we be creating a separate blueprint for each widget we might use in VR? I’m assuming so, since there may be times where you need multiple widgets visible at the same time (for example, an interactive widget for an in-game object such as a keypad or a storage box, plus say the player opens a wrist menu).
Any good way of determining which player clicked a button? I’d like to have a change team button but there’s no way I’m aware or having the menu report who clicked it
Widgets are client side only. You would need to run a server replicated function from a replicated actor and reference your player there.