
Setting up a dedicated server for your Unreal Engine 5 game is a crucial step if you’re aiming to support multiplayer gameplay at scale.
Whether you’re building a competitive shooter, a cooperative survival experience, or a social sandbox, using a dedicated server ensures better performance, security, and reliability compared to peer to peer hosting.
It allows your players to connect to a centralized game instance that runs independently of any single player’s device.
In this guide, you’ll learn how to build and configure a dedicated server for your Unreal Engine 5 project from start to finish.
We’ll cover everything from preparing your project settings to compiling the server and running it locally!
This guide builds a dedicated server based upon our Unreal Engine 5 Multiplayer Sessions guide.
Click here to follow our guide on Multiplayer Sessions in Unreal Engine 5.
Prerequisites
Before starting this guide you will need a working multiplayer Unreal Engine 5 project and a source build of Unreal Engine.
If you do not have a multiplayer ready project click here to follow our guide on Multiplayer Sessions in Unreal Engine 5.
You must have a version of Unreal Engine built from source and not downloaded from the Epic Games Launcher to build a dedicated server. Click here to read how to build a source version of the engine.
You MUST have the AdvancedSessions plugin installed on your project for your server to show in the session browser correctly! Click here to download the AdvancedSessions plugin.
What is a Dedicated Server?
A dedicated server, in game development terms, is a computer that can run a standalone piece of software which only handles the game world and server code.
It does not spawn a player character and does not count as a connected player.
The first method when setting up networking in a multiplayer game for many is a listen server.
A listen server is perfect for many styles of multiplayer games as it works well with games with small player counts per server (2 to 16), keeps costs down for developers and make developing features easier with faster testing between two clients.
For some games this isn’t ideal as players might cheat, have sync inconsistencies between clients that would be game breaking (fighting games over large latency) and larger scale games causing the host machine to slow down impacting other player’s experiences.
Dedicated servers are perfect to remedy these issues. Running the files that we will be creating on its own machine, with ports setup correctly, will only process your game world and keep an server of your game running 24/7.
Automatic Session
We need our server to automatically create a session and then load the map on launch.
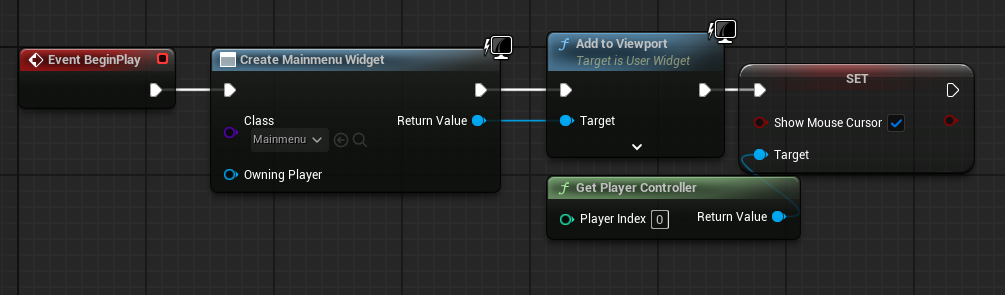
In our example project, which can be downloaded in a first person or third person format, we create our MainMenu widget and add it to the screen in our main menu level blueprint.
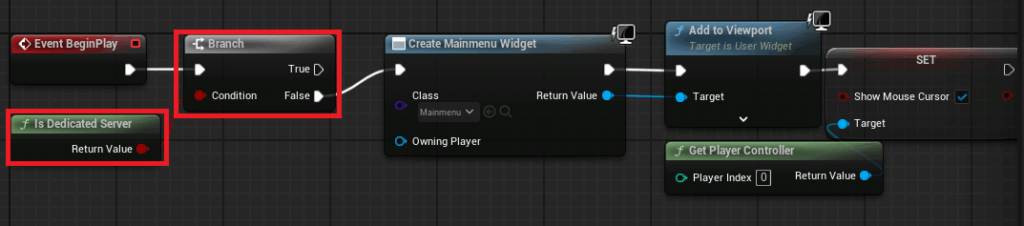
We need to adjust this so if it is a dedicated server then we ignore the menus entirely and create a session for our players to join!
To achieve this, we simply add a branch and an “Is Dedicated Server” node before our widget creation.
This is then connected together on the False pin as we don’t want the code to run if our platform is “Dedicated Server”.
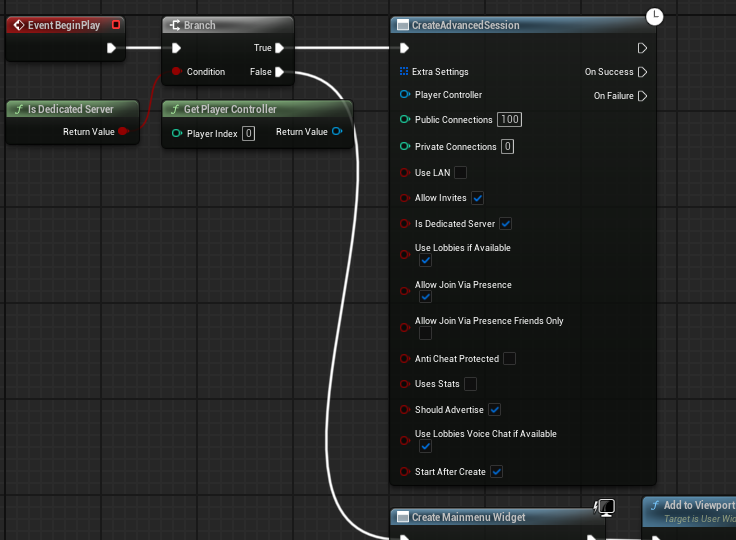
On the True pin we then add a Create Advanced Session node with our desired settings.
If our session creation was a success we then open our level with the option ?listen so that our server can accept connections to the map.
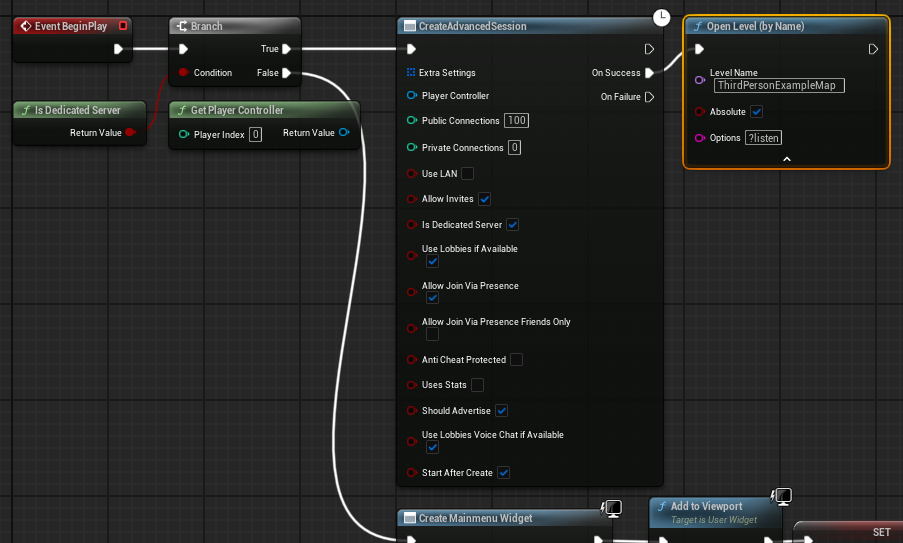
Lastly, we compile and save our changes!
Choosing the Default Server Map
By default our dedicated server loads into an engine map called “Entry”. We need to change this to our own map to ensure that we can load players into the game.
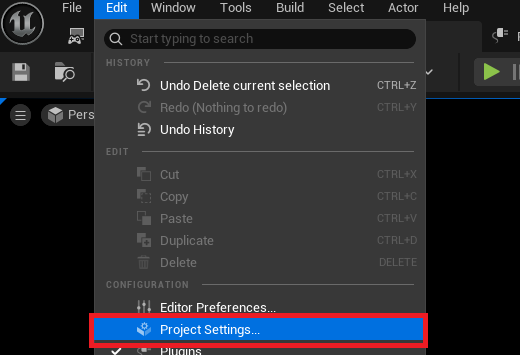
Firstly, open the edit menu in the top left and then click Project Settings.
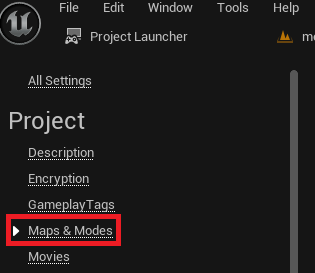
We then click the “Maps & Modes” section of the Project Settings.
We then click the Advanced drop down option in the “Default Maps” section.
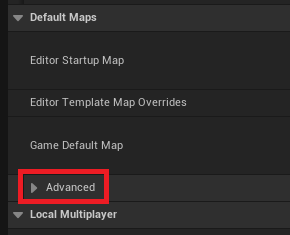
Finally, set the “Server Default Map” option to the map that you want to start your server on. In this case we are using our “menu” map and making changes later in the guide to add dedicated server functionality.

No Default Character in the Level
As we are using a dedicated server, we no longer need a character spawned for the authority (server host).
Our level has a character blueprint inside of the level that gets controlled by the first player connected.
We need to remove this to prevent a character standing in the level with no player!
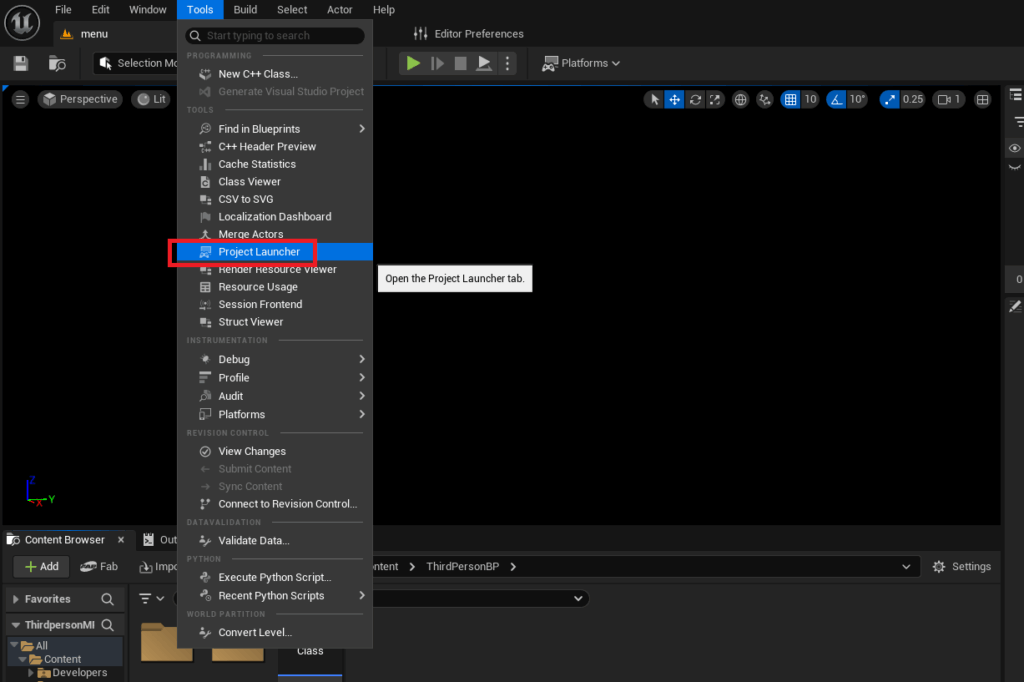
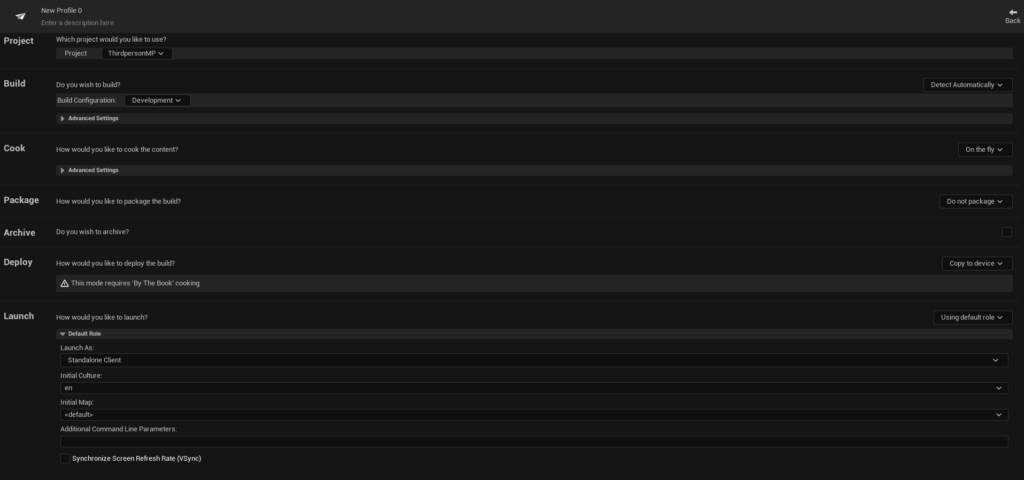
The Project Launcher
The project launcher is a built in tool of Unreal Engine that allows you to build versions of your game based on profiles that you can create.
One of the abilities of the project launcher is the dedicated server!
We can open the project launcher by opening the Tools menu at the top of the editor window and selecting the Project Launcher in the tools section of the menu.
You should now see a large empty menu! We now need to add our custom profile for our game!
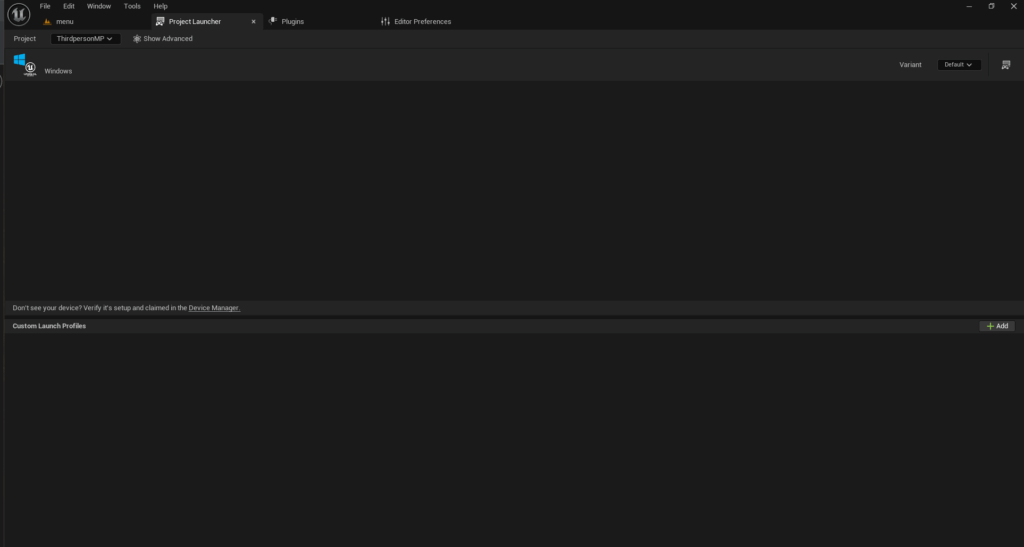
We need to create our custom profile to specify to the engine that we want a dedicated server build.
Creating the Custom Profile
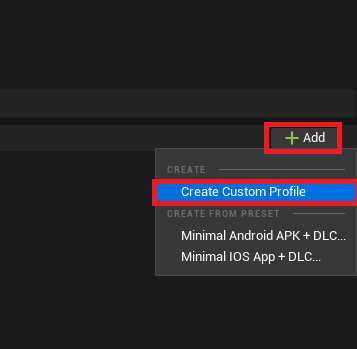
Firstly, click the Add button in the bottom right, then click “Create Custom Profile”.
You should now see a large menu of options appear.
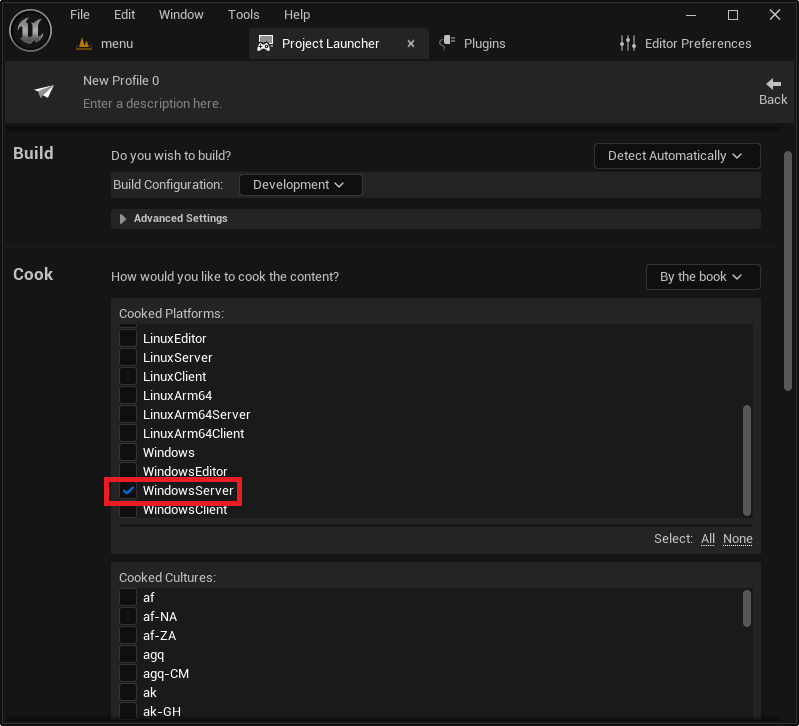
In the cook section, we need to open the drop down menu and change “On the fly” to “By the book”.

We then scroll down the Cooked Platforms list and find the server platform we want to build for. For this guide we are building a dedicated server for Windows.
You can choose LinuxServer if you need an x86/64 Linux server or LinuxArm64 if you want to host your server on Linux Arm. If you do not understand this, simply choose WindowsServer.
We then scroll down further and select all of the maps that you want to include in your server. In this guide we have selected both of the maps in the Unreal Engine 5
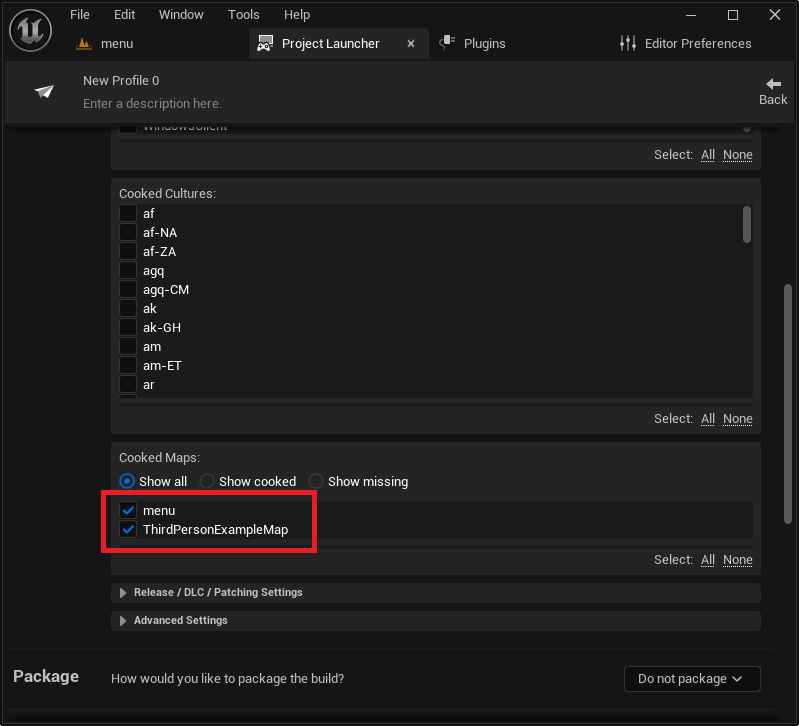
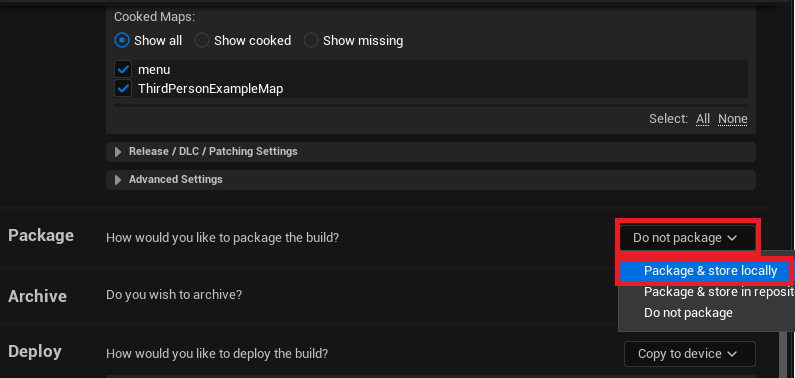
Next in the Package section, click the drop down menu and change “Do not package” to “Package & store locally”.
This then generates you a default path inside of your project folder to build the server. This can be changed to anywhere you want using the directory picker “Browse” button.
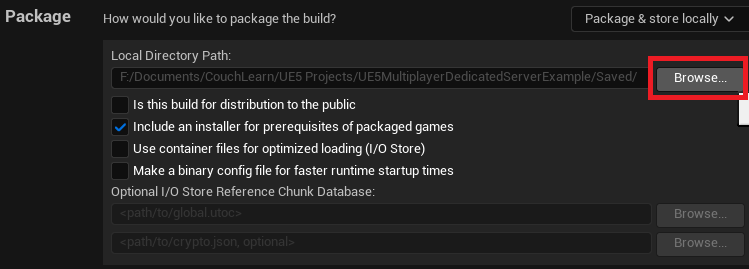
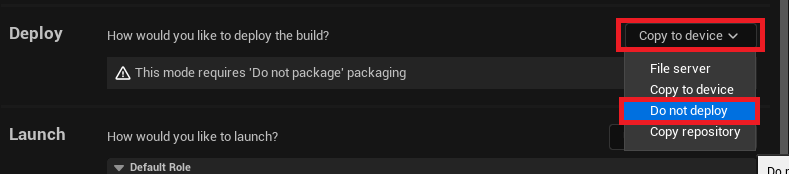
Then, in the Deploy section, click the drop down menu and change “Copy to device” to “Do not deploy”.
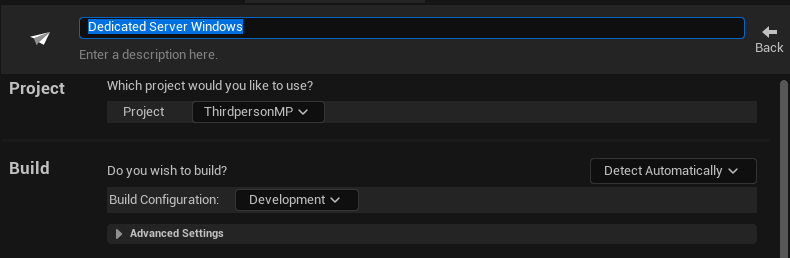
Finally, we can give our new profile a name to remember what this Profile builds.
Creating the Dedicated Server
Now that we have our profile all setup, we can now build our dedicated server!
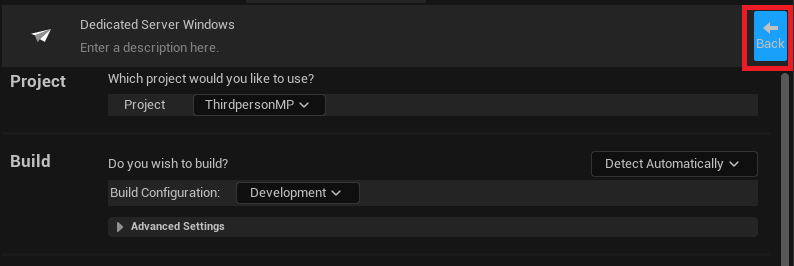
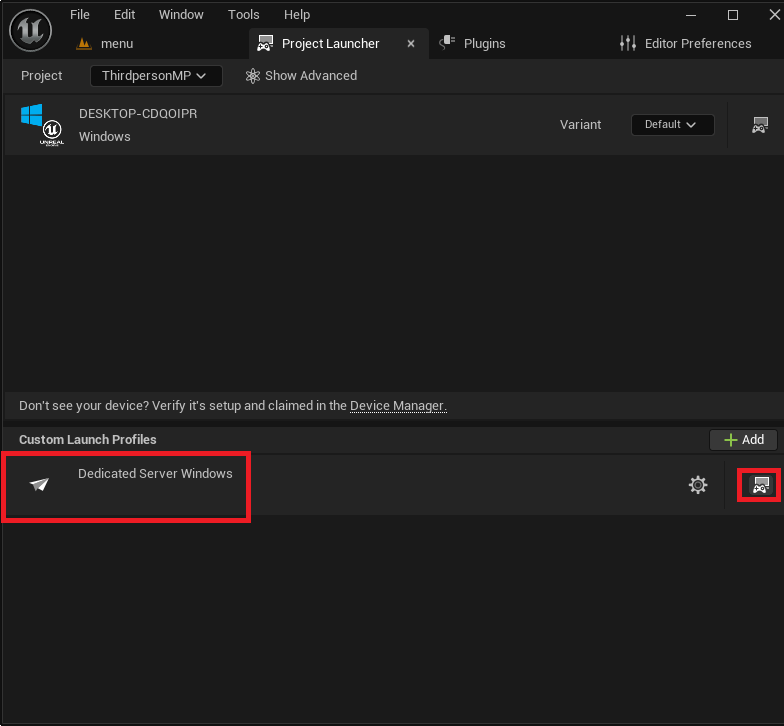
Click the back button to return to the main Project Launcher menu.
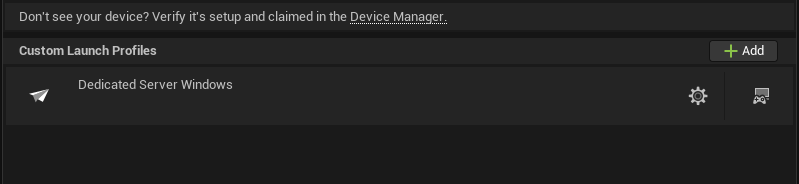
We can now see our new profile in the list of custom launch profiles.
Building the Files
To build the dedicated server using our custom profile, simply press the launch button (Controller and display icon).
You now see the process of your dedicated server automatically building!
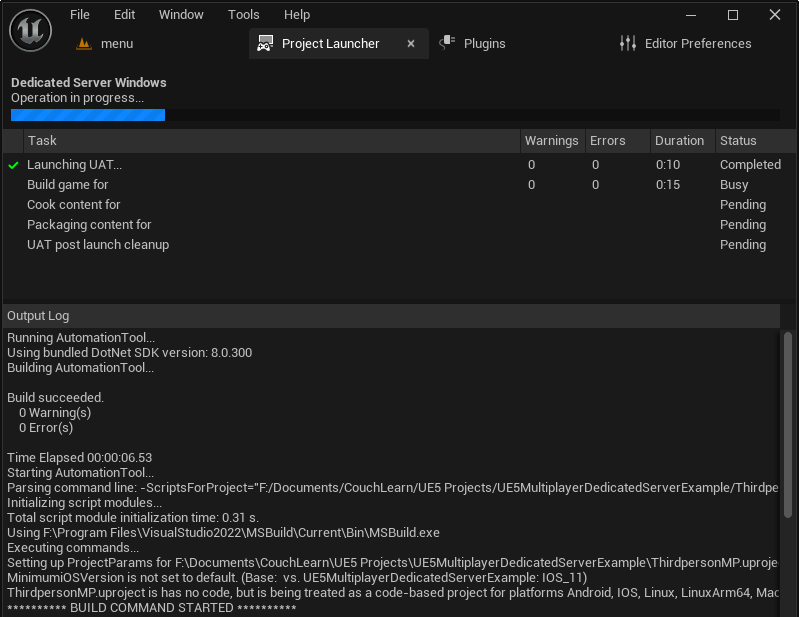
Now wait until the process has completed. The first time you run your profile it can take a long time. Leave this to fully complete before moving onto the final step!

Testing the Dedicated Server
Now that our dedicated server has built successfully, navigate to the folder you selected earlier to see the executable.
If you left this option default in the previous step, the folder found in your project folder then Saved/StagedBuilds and then the platform name. In this case “WindowsServer“.
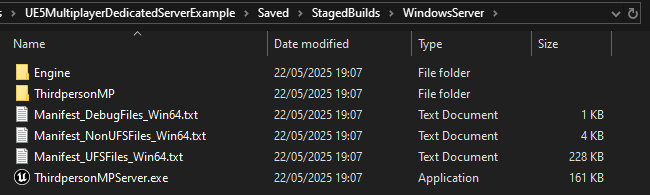
From here we can open our Server.exe to open the server. This will open in the background and is hard to monitor and close.
To make this easier to use, firstly create a shortcut in Windows for your server executable.
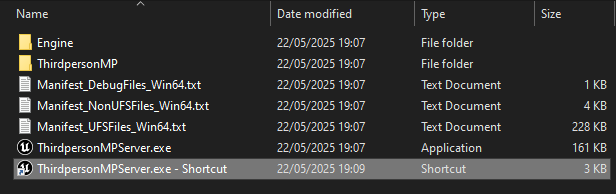
We then open the executable and add the “-log” launch option to the end of the target section. This will make the server open as a window and print any logging messages on to the screen.

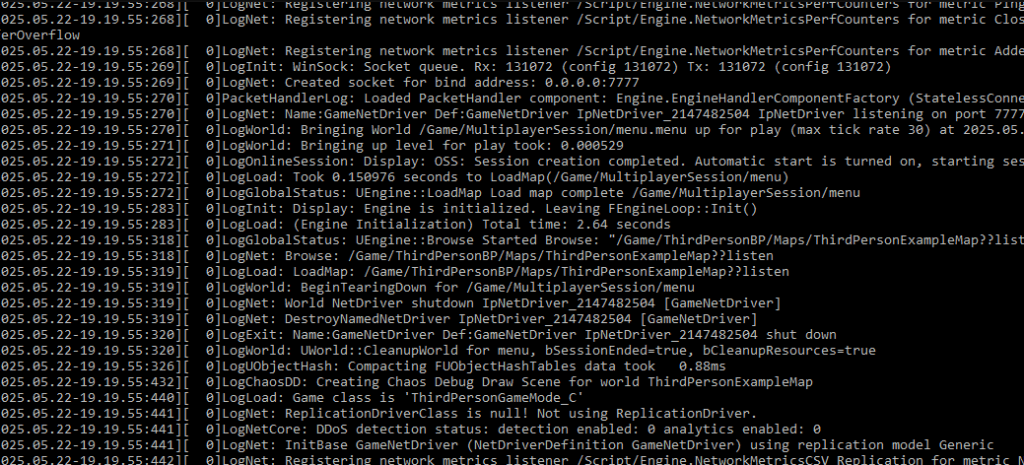
Now open the shortcut to your server and text will fill the window. This is your server initializing and setting up a session for your players to join!
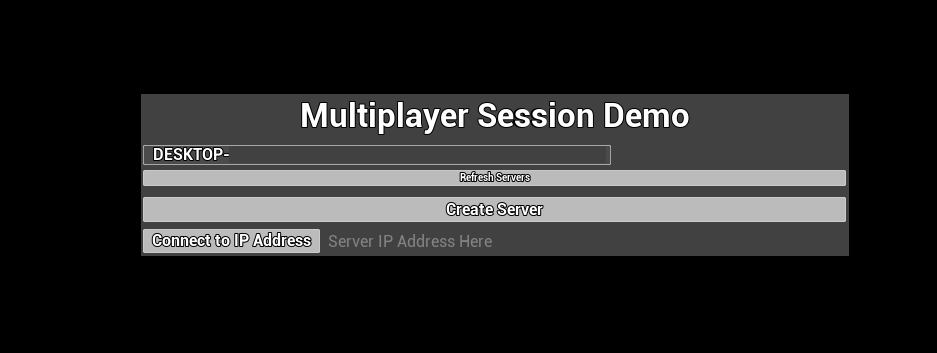
On the client’s view it now shows the dedicated server session!
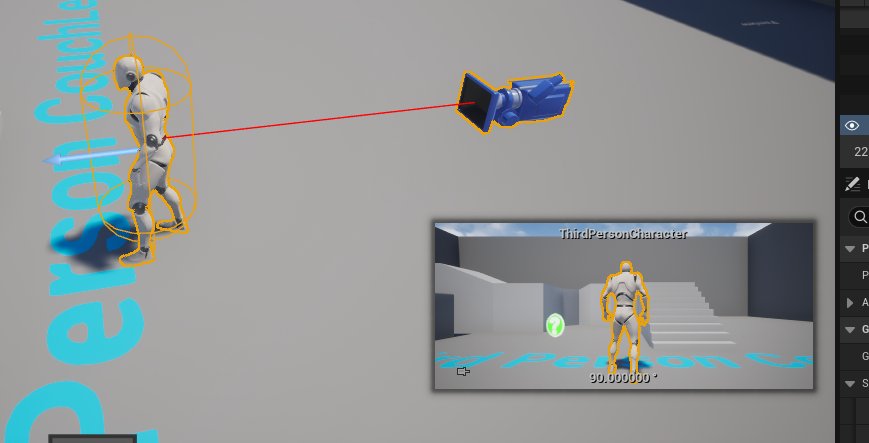
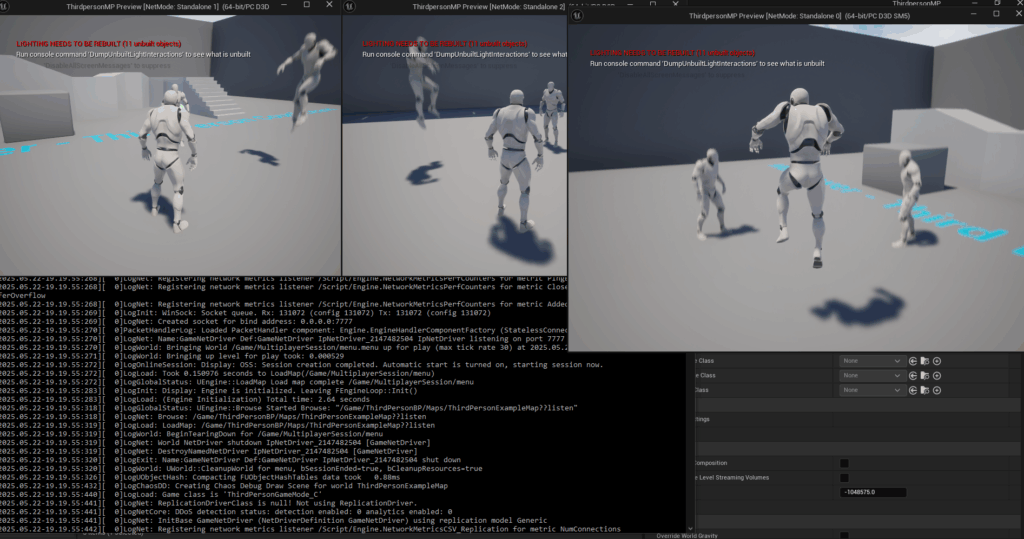
Demonstration
With three clients open inside the editor and our dedicated server open, the clients can connect to the session and see each other move without needing a full client open to host the game!
Project Files
Conclusion
You now have a dedicated server of your game building with the ability to be connected to!
With this knowledge, you’re one step closer to launching a fully featured multiplayer game that performs well and delivers a consistent experience to players!
Leave a Reply