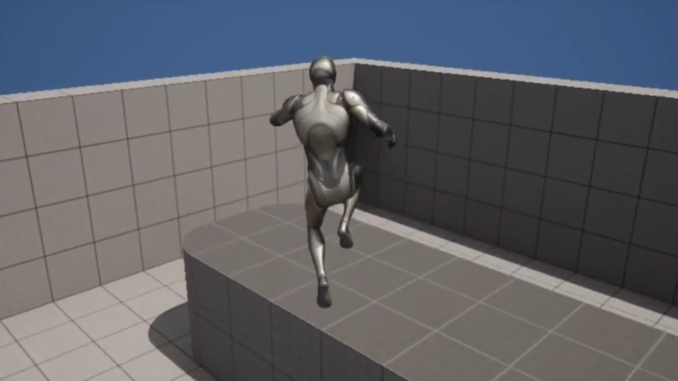
Double jumping is extremely common in retro and modern gaming. Games such as Castlevania Symphony of the Night, Crash Bandicoot, the Kirby series, Banjo-Kazooie, and more have platforming elements that require the use of the double jump to complete.
Luckily, Unreal Engine 5 makes this incredibly easy to achieve!
In this guide we will be showing you how to add Double Jumping in Unreal Engine 5.
We will also be showing some intermediate difficulty animation improvements that you can make to your project to make the animations feel better during the double jump!
Before we Start
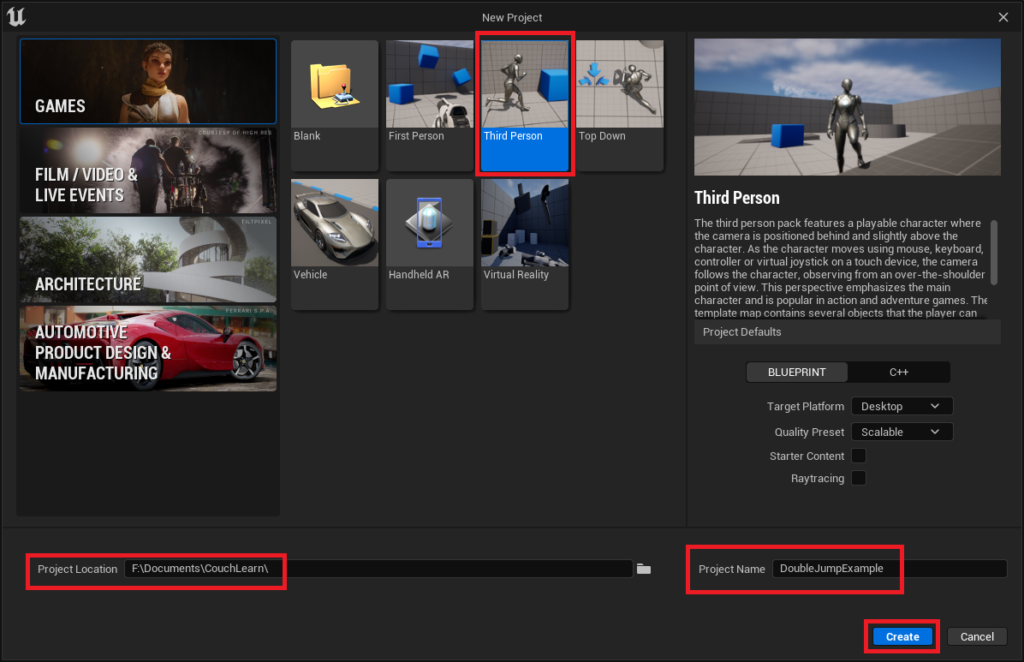
To make this guide easier to understand for new developers, we are using the Unreal Engine 5 Third Person template which is found in the New Project window.
If you already have your project setup with a Character blueprint, skip to the “Adding our Double Jump” section below.
Creating our template project
Firstly, we want to click Third Person, choose a project location on your computer in the bottom left, then give the project a name in the bottom right. Once this is done, click the blue “Create” button in the bottom right of the window.
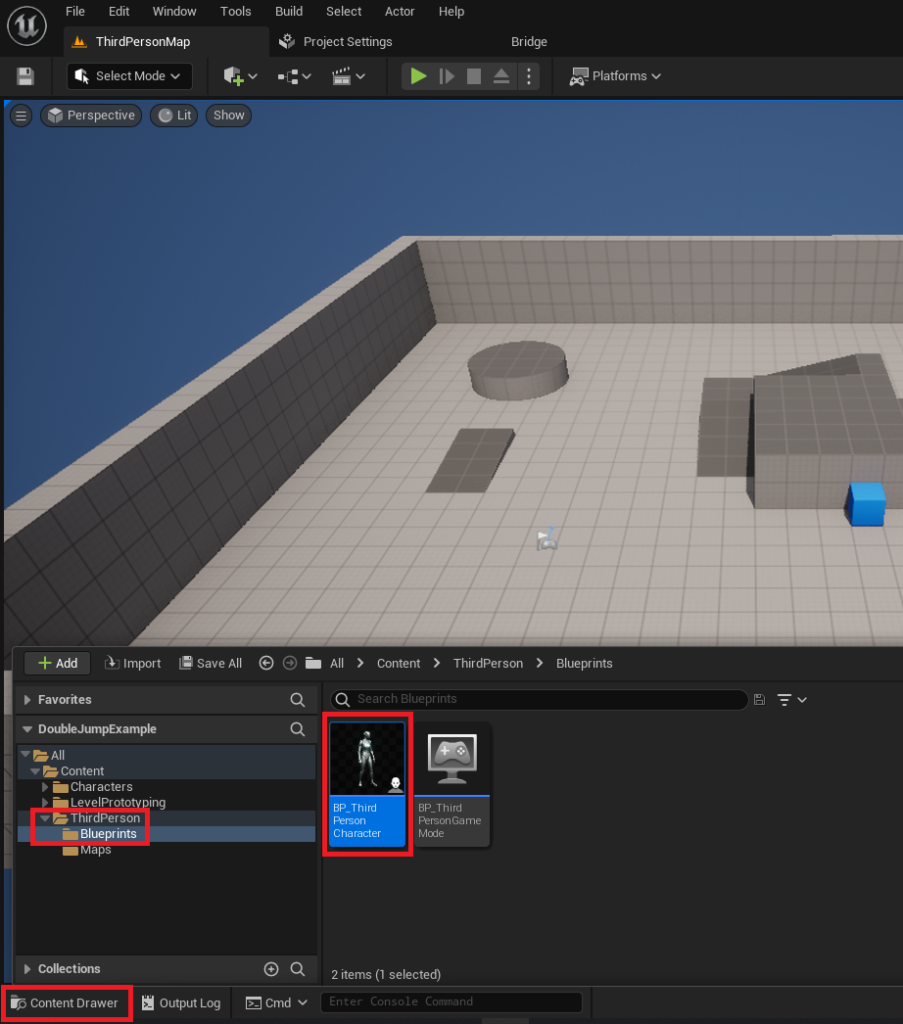
Once the Unreal Engine editor has opened your new project, open the “Content Drawer” in the bottom left of the editor and find the BP_ThirdPersonCharacter object in the Content/ThirdPerson/Blueprints folder.
Adding our Double Jump
The first step to add double jump functionality is to open our Character blueprint and select the name.
In our case this is the text labelled “BP_ThirdPersonCharacter (Self)”. Once this is selected the text will go blue as shown below.

On the right side of the blueprint editor you will find the “Details” tab. Look through the details tab until you find “Character” and the “Jump Max Count”. This value is set to 1 by default.

Now as we want to have our character double jump, change this value to 2. If you require more than 2 jumps for your character, change this value to whichever suits your needs.

Once this is done, remember to click the “Compile” and “Save” buttons in the top left of the blueprint editor.

Simple Double Jump Demo
Your character is now able to double jump! As you can see in the demo video below the character is double jumping successfully.
However, one problem you can see is the animation only plays once. In the next section we will be fixing the animations so they play correctly for all jumps.
Animation Improvements (Intermediate Difficulty)
As the double jump doesn’t look right in the previous demo, we now are fixing the animations.
Firstly, open the “Content Drawer” and find the ABP_Manny object in the Content/Characters/Mannequins/Animations folder.
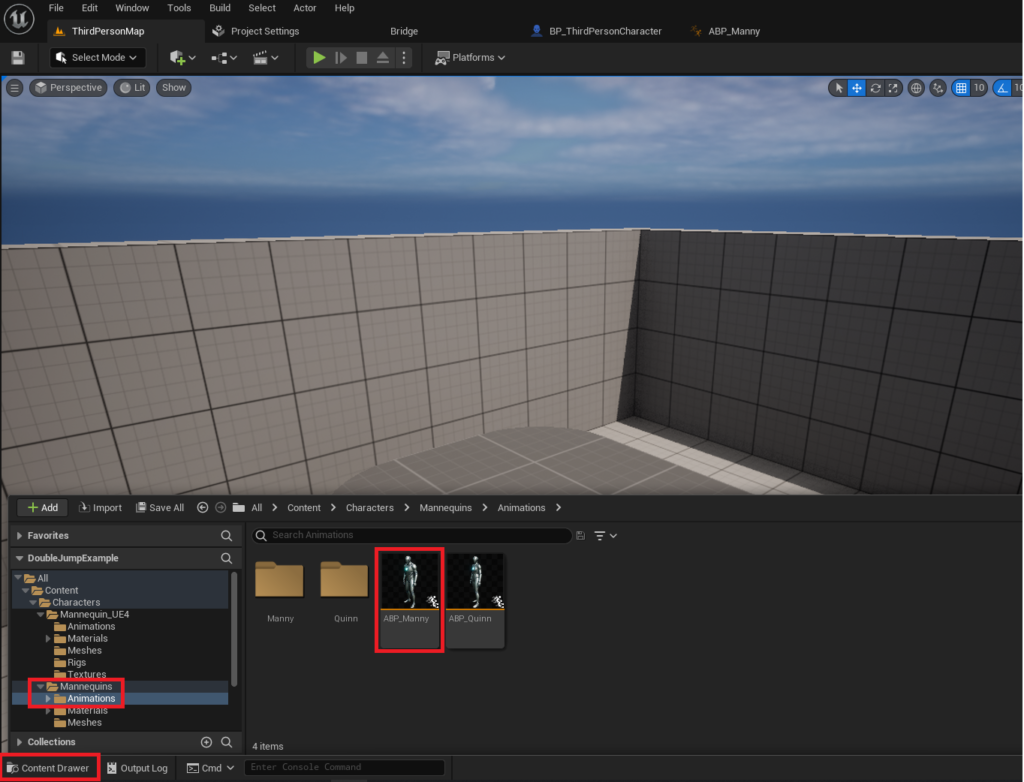
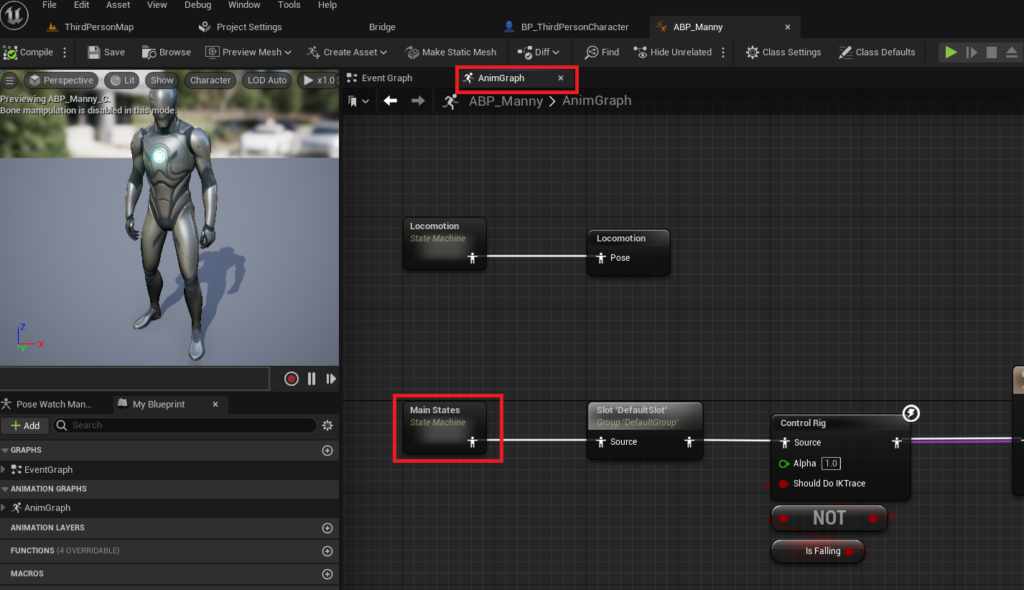
Now the animation blueprint editor is open, find and double click the AnimGraph text in the left of the editor window.

Next, with the animation graph now open, click the “Main States” state machine. This is where all of the animation transitions are held for our character.
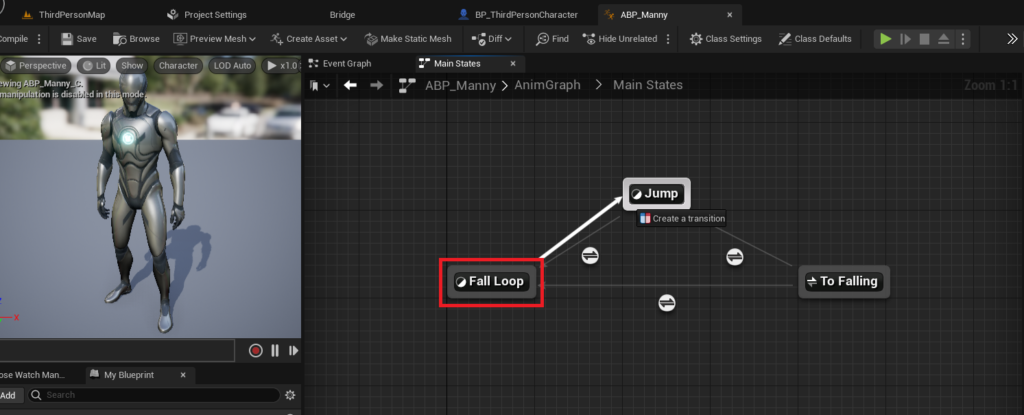
Inside the Main States state machine, drag from the state named “Fall Loop” to the state named “Jump” as shown in the image below. If done correctly you should see an arrow and text stating “Create a transition”.
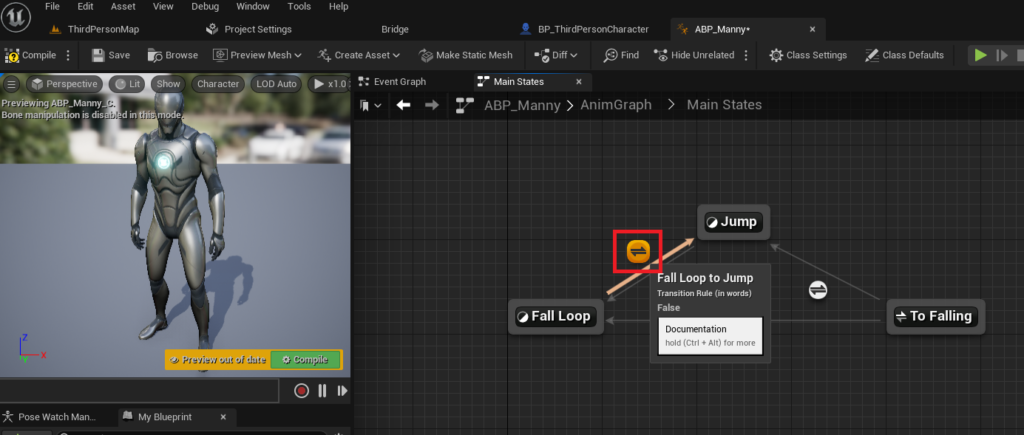
With our transition now created, click the icon to open the transition editor.
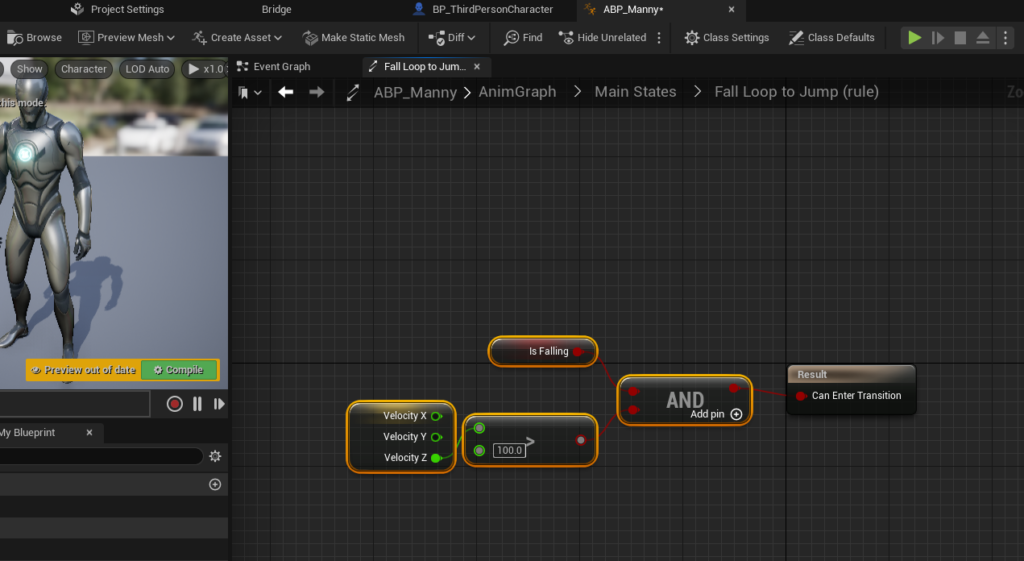
Finally, in the transition editor add the blueprint nodes shown in the example image below.
These nodes allow the animation state to return back to the jumping animation once you trigger the double jump.
Advanced Animated Double Jump Demo
Your improved double jump is now complete! As you can see in the video below, the animations are much better and the player now gets visual feedback when they double jump.
Download the Project Files
Conclusion
Your Unreal Engine 5 project now has a double jump capable character! For a challenge, do try to follow the optional animation improvement steps as it really make a difference to the experience!
Further Reading:
Official blueprint guide to setting up a new character mesh in UE5
Full ACharacter documentation for advanced jump settings in C++
Hi Matt! this is a really stupid question but I’m just starting out. what are each specific node called in the second last image called? any help would be greatly appreciated!
There are no stupid questions. Ask as many questions as you need! Here are the nodes:
Get Velocity
Greater than
Get Is Falling
AND Boolean
Hope this helped!
hey there matt. I managed to get this working. I changed it so that I can hold the button for a bit larger jump. but I would really like to change some things about the second jump. I would like the second jump to no longer be possible after the top or just after the top of the first jump. I also would like to remove the hold button to go higher on the second jump.
Hey Matt, I’m not able to find the correct Get Velocity BP node. Its just giving me a target and return value, not the individual directional components
Ensure that you are dragging from the character component when getting the velocity.
If you’re pulling from the velocity vector you’ll need to break it. drag from the velocity node into empty space and select “Break Vector” then you can grab the Z and plug it into your > node.