
In this guide we will be showing you how to automatically generate and configure levels of detail for skeletal meshes compatible with animations in Unreal Engine 4.
There are plugins that can create levels of detail but this is the best way to create easy LODs for skeletal meshes in Unreal Engine 4.
This guide requires Unreal Engine 4.22 or higher!
In this guide, we will be using skeletal meshes from the Animal Pack Ultra by JanPecnik on the Unreal Engine Marketplace.
If you are looking for easy automatic LODs for STATIC meshes, read at our guide here.
What are LODs?
LOD (Level of Detail) is a technique found in all game engines that switches between different complexities of a 3D mesh over distance to reduce the amount of polygons that are needed to draw the scene.
These LODs, when setup correctly, will improve your games GPU performance!
Creating Levels of Detail
Firstly, to automatically generate different LODs for your skeletal mesh, open the mesh from the content browser.
Once the mesh is shown find the LOD Settings tab in the details section on the left.
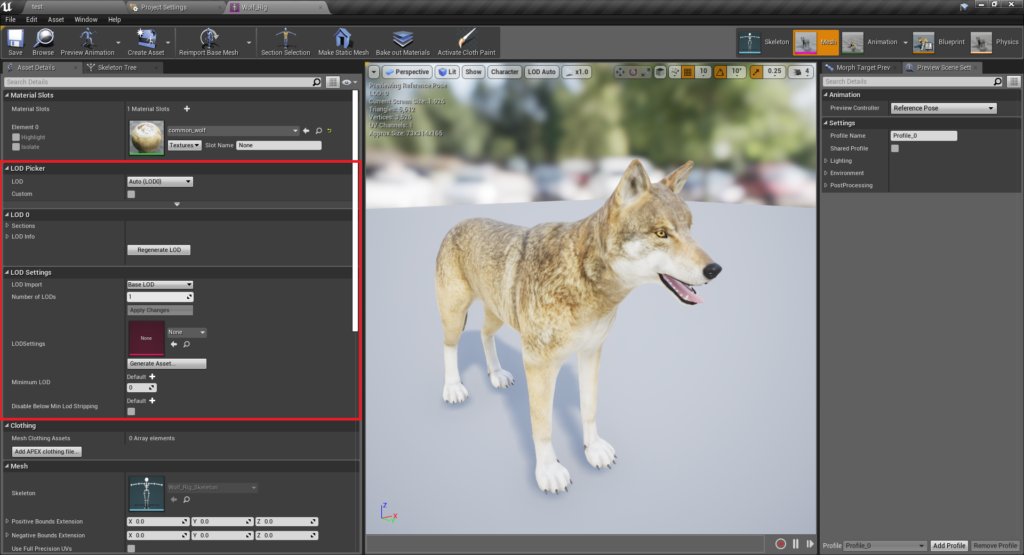
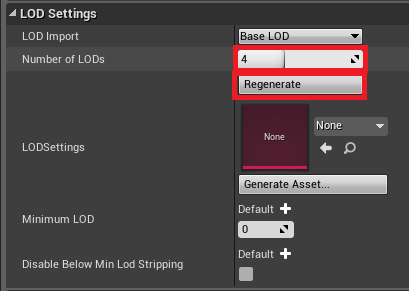
Increase the “Number of LODs” slider to the amount that you want, then press the “Regenerate” button.
For this guide we chose four LODs. You can create and setup as many levels of detail you need for your specific mesh.
Setting up the Level of Detail
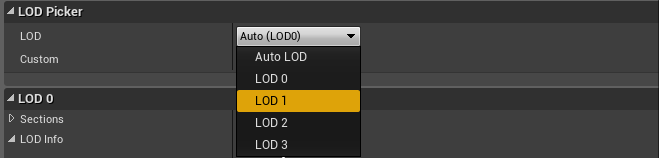
Firstly, inside the LOD drop down box, select the LOD level you wish to adjust.
Then, as LOD 0 is our full detail mesh, we want to change LOD 1 first.
Changing the LOD Distance
Inside the LOD Info drop down adjust the screen size value to the size we want for this LOD to be visible on the screen.
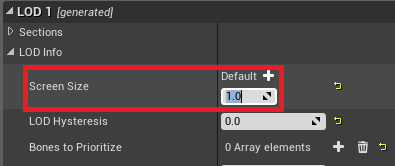
For this mesh we used these screen size values:
- LOD 0: 1.1
- LOD 1: 1.0
- LOD 2: 0.75
- LOD 3: 0.2
These values give the model a high quality look then quickly drops the mesh detail down over longer distances.
Reducing the Triangles
Inside the “LOD Info” drop down find the “Reduction Settings” section and adjust the “Percent of Triangles” value to what ever you require.
0.85 (15% reduction in triangles) works well for this skeletal mesh at LOD level 1.
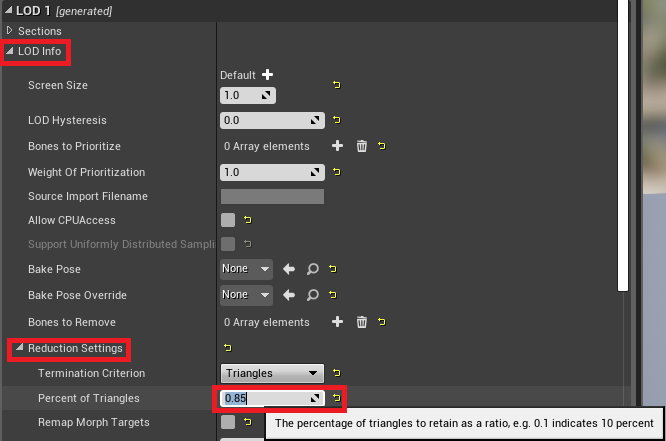
For this guide we used these percent of triangle values:
- LOD 0: 1.0
- LOD 1: 0.85
- LOD 2: 0.45
- LOD 3: 0.1
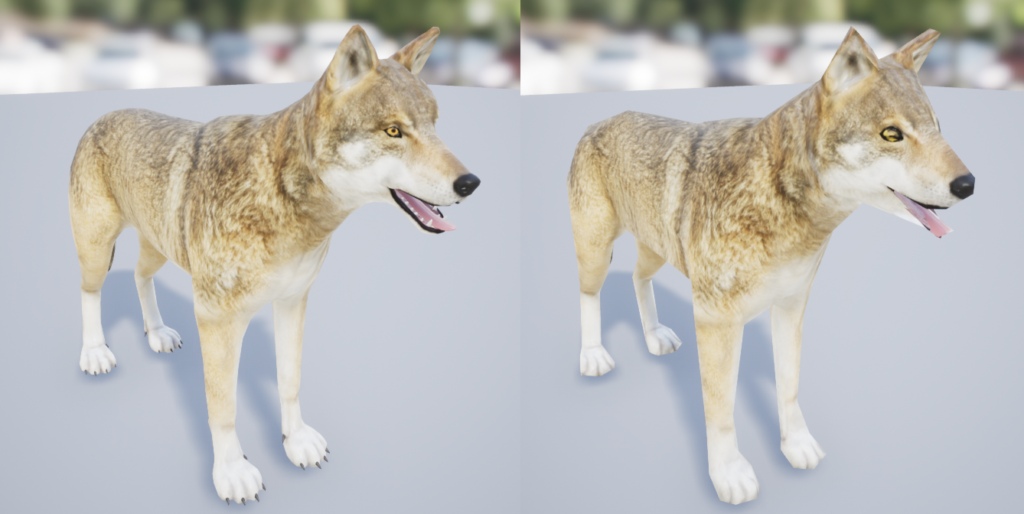
Demonstration
Finally, with the settings used in this guide, the skeletal mesh will change between these LOD states based on the distance from the camera.
This reduced the complexity of the model, boosted your game’s performance whilst maintaining a high level of detail and quality at shorter distances.
Conclusion
Now your skeletal meshes are setup to dynamically change in quality over distance!
This simple setup drastically improves performance for lower end machines as is essential for an optimised game.
This technique is not a silver bullet for performance, but if implemented correctly, will increase the performance on many PCs when using high poly meshes.
This technique in conjunction with the static mesh level of detail setup will allow your game to contain more meshes and allow higher detail scenes without affecting performance heavily!
Click here to read the official documentation for the skeletal mesh reduction tool in Unreal Engine 4
Click here to setup automatically generating levels of detail for your static meshes in Unreal Engine 4
Leave a Reply