
Unreal Engine 4 has robust pathfinding and AI movement built in.
Using the navmesh (Navigation Mesh) and a pawn or character, simple and advanced AI can be created that interact with the world and the player. Even in a multiplayer session!
With very little setup you can implement Simple AI Movement in Unreal Engine 4.
In this guide we will be setting up the basics needed for Simple AI Movement in Unreal Engine 4 and explaining the differences between the pawn and character objects.
Before we create our AI blueprint, we need to add a navigation mesh into our level.
The navigation mesh generates the area that your AI is able to move it.
If there are objects in the way it will generate around these areas preventing your AI from walking into those objects.
Creating the Mesh
In the modes tab, found on left in the main editor window, search for the nav mesh bounds volume.
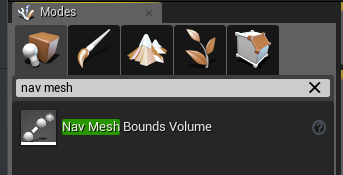
Drag this into your level and set the size and position of the box to be the size of your level.
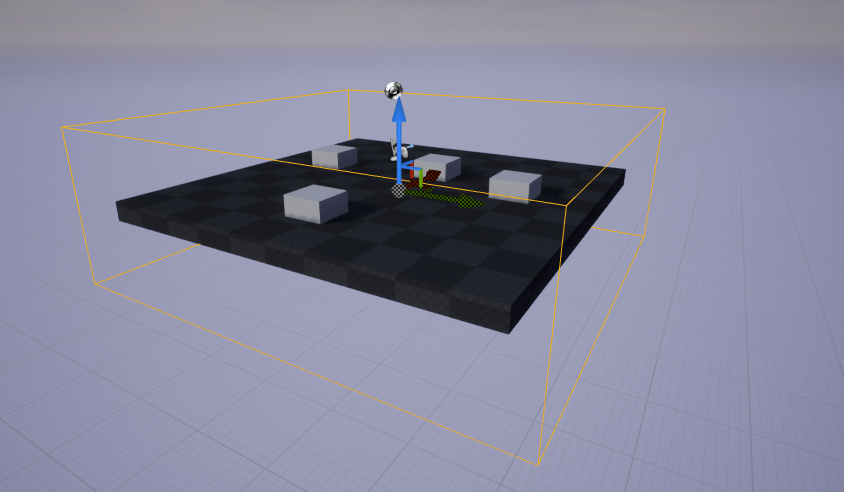
Once you drag this into your level it will automatically generate the navigation mesh.
Pressing the P key will show the nav mesh in green.
Your level is now ready for AI characters and pawns.
Character or Pawn
What’s the difference?
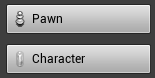
The two default AI controlled types are the Pawn and the Character.
Character
The character, which is a child of the pawn, has built in multiplayer and singleplayer ready movement, gravity, jumping and crouching via the movement component.
This also means characters can walk around the level without adding almost any code.
To read more about Characters click here.

Pawn
The pawn is the base class of every AI controlled actor. It has no built in movement and does not have gravity or any other features such as crouching or sprinting.
To read more about Pawns click here.

Which is the best?
In most cases it is advised to use a Character as the features are very powerful and makes programming enemies and other AI much easier.
Characters are setup ready with gravity, walking and pathfinding along meshes and terrain.
If you know what you are doing or if you need to make your own specific movement code (flying, submarine, etc) then the Pawn would be best.
Simple Move to Actor or Location
The Simple Move to Actor and Simple Move to Location nodes are the easiest way for your character or pawn to move towards an actor or location in the game world.
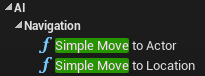
With a few inputs, this node smoothly moves the actor to the destination.
One downside of this node is that the movement does not give feedback if it failed or is stuck or it had aborted the movement.
These feedback pins are very important to adjust the behavior of your AI controlled actor.
Example
For this example we used the Simple Move to Location node.
Completed, the nodes should look like this:

These nodes find a random position in the navigation mesh and moves the AI to it.
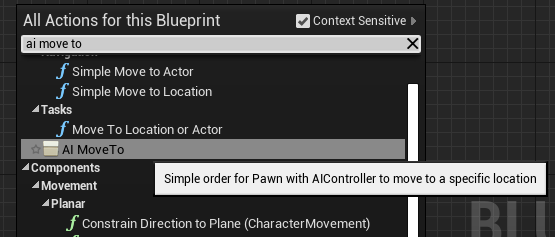
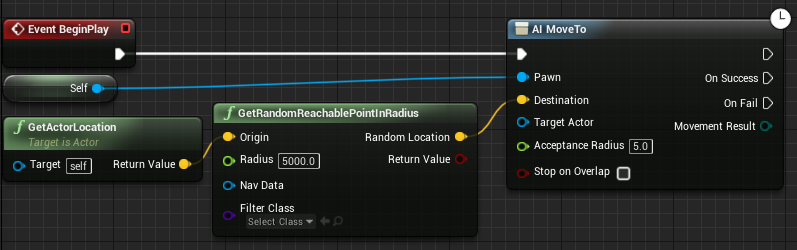
AI Move to
In your character or pawn blueprint, add an AI MoveTo node for more advanced movement with more diagnostic features.
This node can navigate your AI to either a target actor (any actor in your level) or a destination vector.
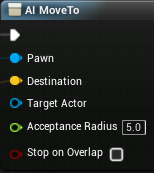
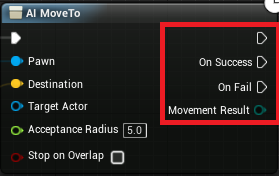
The AI MoveTo node also allows an acceptance radius which sets how close an AI will move to the actor or destination vector before stopping.
These execution pins output based on the current state of the AI.
The top pin will fire after this node is executed.
Example
Conclusion
Now your new AI controlled character can move around the level!
Using this setup with additional blueprints you will be able to create more advanced AI with different behaviours.
Further Learning
To make this AI react to your level changing during play click here to read our guide on dynamic pathfinding in Unreal Engine 4.
For larger open world or procedurally generated levels click here to read our guide on optimised pathfinding for Unreal Engine 4.
When creating more advanced AI it is best to begin using Blackboards and Behaviour Trees.
This worked perfectly and fixed my ‘accessed none’ error thanks!
Very well done explanation / tutorial.
Thanks for the support!